


I wanted to make several of these cards so I cut four 3-3/4" x 5" panels from Bristol watercolor paper. This watercolor paper is a dream to work with especially if you are going to be blending Distress Inks and using some basic techniques with water. It allows perfect blending with no marks from the blending tool left behind.
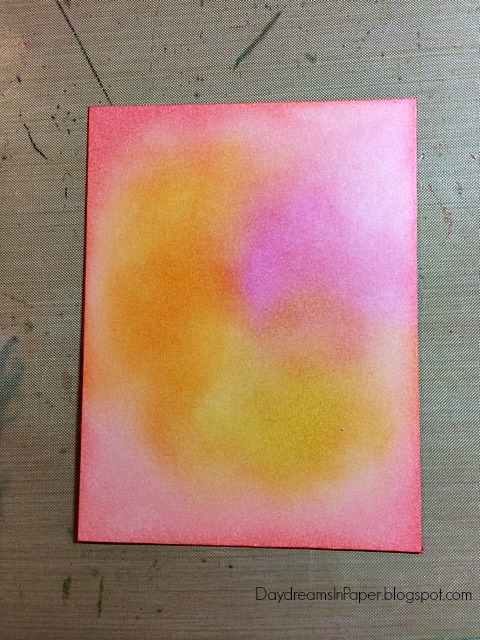
I ink the panel in random areas using Worn Lipstick, Picked Raspberry, Spiced Marmalade and Fossilized Amber Distress Inks.

I then spray the panel with water using a Ranger Distress Sprayer. I leave the water on the paper for about 45 seconds and then put a paper towel over the panel to absorb the drops of water and lift the ink.

Here you can see what my panel looks like after applying the water. I let the panel completely dry before moving on to the next step. You can use a heat tool to speed up the drying process.

When the panel is completely dry, I stamp the smallest heart from the Simon Says Stamp Sending Happy Thoughts stamp set in random areas with Simon Says Stamp Magnolia dye ink. I will be using a second generation stamping technique. To do this, I ink the heart stamp and stamp it onto an extra sheet of scrap paper that I have off to the side. I then stamp the heart onto the panel without adding any more ink to the panel. I do this for each heart that I add to the panel. This will result in a lighter color when stamping, which is just the effect I'm trying to achieve. I want the hearts to blend in the background, sort of like stars in a galaxy.

Next, I stamp on the largest heart from the same stamp set in random areas using Simon Says Stamp Teeny Bikini dye ink. I do not use the second generation stamping technique when I add these hearts.

To make shaker section of the card, I use 5" x 7" photo sleeves. I get them here. I use one sleeve per card and there are 50 sheets in a box. Each sheet contains two 5" x 7" photo sleeves, so you can make 100 shakers cards from one box of these photo sleeves! I place the card panel in the photo sleeve and line the fuse tool ruler just below the bottom of the card panel.

I then very slowly and carefully run the Fuse tool inside the slotted line on the ruler to seal the plastic together. (There are a few tricks to using the Fuse Tool. Make sure that it is very, very hot before you start sealing the plastic. It takes a while to heat up, but if you don't wait until it is fully heated it will not seal the plastic of the sleeve together. Seal the plastic very slowly along the slotted line in the ruler. The tip looks like a wheel and rolls very easily but you must go slowly to seal the plastic well. Also, I highly recommend the Fuse Tool Mat. It will withstand the high level of heat this tool puts out.)
I seal the bottom and sides of the sleeve and then add the shaker pieces. When all the pieces are added, I then seal the top of the sleeve.

\
Here is a look at the shaker panel for my card. All four sides are sealed and it looks perfect. I completed this very quickly and I was able to crank out several shaker panels. This makes me so happy because it took half the time to create than the old way using 3D foam tape and making a back and front panel along with a plastic sheet in the center.

I make a frame to go around the shaker piece by cutting a 4-3/4" x 6" piece of coordinating card stock for the frame. The color of card stock I use is Candy Hearts by Bazzill. I cut out the center of the frame using the Spellbinders Matting Basics A die. I use the second to the last largest die (3-3/4" x 4-3/4"). I then emboss the frame with the Cuttlebug Cross My Heart embossing folder.
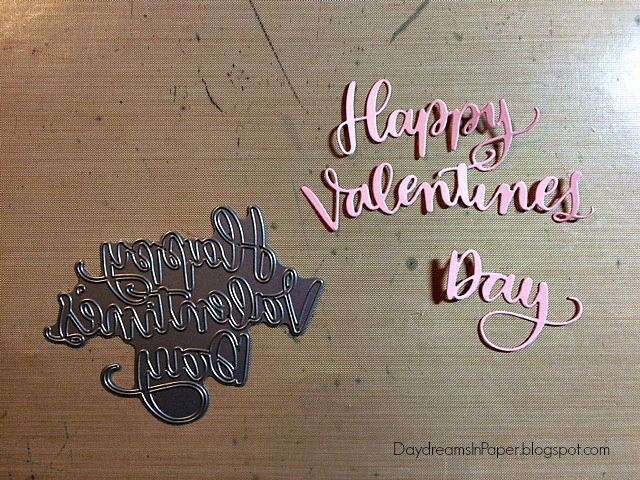
For the sentiment, I simply want it to say "Happy Valentine's Day", so I use the Simon Says Stamp Big Valentine's Day wafer die and cut it out of My Favorite Things Bubblegum card stock.

I adhere the embossed frame to the shaker panel with X-press 1-2" double-sided tape, add the sentiment right on top of the plastic of the shaker panel using Ranger Multi Matte Medium. I apply the medium on in very tiny dots so it doesn't ooze out the sides of the letters. I adhere the entire panel to a top folding 4-3/4" x 6" card base and my card is finished.
Thanks you so much for sticking with me to the end and I hope you enjoyed my tutorial. I love making Valentine's Day cards and plan on making a bunch more.


Thanks for the tutorial. I bought that fuse tool about 6 months ago but haven't used it yet. I may try it out this weekend. Thanks for the inspiration.
ReplyDelete