Monday, May 30, 2016

Simon Says Stamp Monday Challenge - Monochrome

Hi Everyone! I hope you've been joining us on the Simon Says Stamp Monday Challenge Blog. If you haven't, check out the blog for this week's challenge theme which is, "Monochrome".  There's so much inspiration! Don't forget to check out the amazing and wonderfully talented artist, Karen Hayselden. She's been an inspiration to all of us this month as our guest designer.


I chose different hues of brown for my project. I have to admit it was a little difficult not to add another color to the palette and I did sneak in a little, teeny, tiny, itsy, bitsy, bit of pink. I kept telling myself this was okay because some shades of brown have a pink hue to them, right? Anyway, here's my piece called, "Couture".


I cut the dress form from the Tim Holtz Sewing Room Bigz Die out of one of the sheets of cardstock from Prima's Tales of You and Me Collection.


I wanted my dress form to have a skirt so I hand cut a skirt form from the same Prima card stock collection and sprayed it liberally with water on both sides. This allowed the paper to break down so I could form a skirt.


Very carefully I manipulate the paper and fold it in a fan shape making sure each fold of the skirt is even.


When the skirt is completely dry, I place it over the dress form to see how it fits. You can see the dress form is a bit wider than my skirt.


Instead of making the skirt over again, I trim the dress form down on the sides. This will not show on the final project so it's an easy fix.


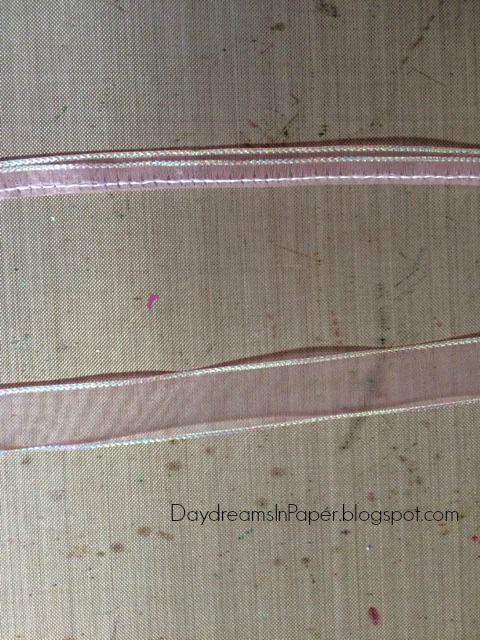
To add a little bling to the skirt, I took some sheer ribbon that had shiny thread on both the top and bottom. I folded the ribbon so the bottom thread would lay just below the top thread and sewed that down with my sewing machine. This would be the sash for my dress.


I placed the ribbon just above the skirt on the dress form. The sewing thread shows at this point but it will be covered up with another ribbon element later.


I wanted to give my dress a little touch of whimsy so I cut a butterfly from the Tim Holtz Detailed Butterfly Die. Here is where the little, teeny, tiny, itsy, bitsy, bit of pink came in. I edged the butterfly wings with Spun Sugar Distress Ink using a mini blending tool.


I then edged the wings with Ground Espresso Distress Ink to tone down the pink color.


I cut the butterfly in half with my Tim Holtz Scissors so I could place each wing behind the dress form.


I begin creating my background and cut a frame from Spellbinders Timeless Rectangle Die out of a piece of Simon Says Stamp Dark Chocolate card stock. I then cut out the center of the rectangle with another rectangular die. You can use any rectangle die you have one hand, I used the 2-3/4" x 4" inch pierced rectangle die by My Favorite Things.


I adhered the frame to the center of a 5x7 piece of card stock from Prima's Tales of You and Me Collection and distressed the edges using Prima's Distressing Tool.


I then adhered that to a 6x8 piece of Simon Says Stamp Dark Chocolate card stock and distressed the edges.


I cut my dress form pedestal off to lengthen the form. When I adhered the skirt to the dress form it was crooked, so this fixed that problem as well. I cut out a left and right fanciful flourish from a Cheery Lynn die. You can use Spellbinder's Foliage Flourish for the same look.


I glued all my elements down, added a brown ribbon to the dress and a few paper roses and called this project done!

I hope you enjoyed seeing how I created my "Couture" panel and that you join us this week in all the fun. Add your project to the Simon Says Stamp Monday Challenge Blog and you could win a $50 gift voucher to their amazing store. I can't wait to see what you create!


For more inspiration, tips and tricks for all types of papercraft creations, follow Simon Says Stamp on:


  Image result for small facebook icon  Image result for small pinterest icon  Image result for small twitter icon  Image result for small youtube icon  


You can find all the following supplies I used to create this project at Simon Says Stamp:


Monday, May 23, 2016

Simon Says Stamp Monday Challenge - Make A Wish

Hi Everyone! This week starts off with another amazing challenge over on the Simon Says Stamp Monday Challenge Blog. This week's theme is, "Make A Wish". Check out all the details on the blog and join us in creating something amazing with our theme!


I wanted to create something colorful with stars raining down representing many wishes. 


I used a section of the Heidi Swapp Confetti 6x6 stencil that contained stars and applied them on my chipboard piece with Ranger Clear Gloss Texture Paste.


After the texture paste was completely dry, I stamped on the Tim Holtz Umbrella Man in the bottom left corner using Ranger Jet Black Archival Ink.


I stamped another Umbrella Man image onto Inkadinkado Masking Paper and fussy cut that out of the masking paper. I used the mask to cover the original Umbrella Man because I wanted the small white areas on the image to remain white. After applying the mask, I sprayed Cracked Pistachio, Mermaid Lagoon, Twisted Citron and Lucky Clover Distress Spray Stain in random areas on the background.


When the distress sprays were completely dry, I gently rubbed over the stenciled stars with a baby wipe. Remember to go over the stars only because the baby wipe will remove the brightness of the distress sprays.


I begin coloring some of the elements for my project. I chose Tim Holtz Mirrored Stars and decided to color them with Ranger Sunshine Yellow Alcohol Ink. Just drip a drop or two over the stars and allow them to completely dry before handling.


I cut two flowers with the Tim Holtz Tattered Florals die from corrogated paper.


I forgot to take step-by-step photos as I created the flowers, but you can see them here on my final project. I sprayed the smaller flower with Cracked Pistachio and Lucky Clover distress spray ink. I sprayed the larger flower with Mermaid Lagoon distress spray. When the flowers were completely dry, I add some Prima Copper Micro Beads and Tim Holtz Mini Gears for the flower centers. I adhered the micro beads with Ranger Texture Paste and the mini gear flower centers using Ranger Multi Medium Matte.


Now that the elements for my project are finished, I begin adding more dimension to my background. Here, I applied a number stamp using Garden Patina Archival Ink. I also added a couple of the Tim Holtz Star Fasteners next to the umbrella. To line the star fasteners evenly, I used the small evenly spaced holes on the Tim Holtz Ruler and perforated the chipboard through those holes with the Tonic Craft Pic. These are two wonderful tools, when used together, that aid in applying small brads or fasteners evenly onto a project.


I applied an image of a grid from the Tim Holtz Visual Artistry Playful Journey clear stamp set with Jet Black Archival Ink.


I added a few more clear stamp images from the Tim Holtz Ultimate Grunge stamp set onto the background with Fern Green and Garden Patina Archival Ink. I then inked the edges of the tag with Black Soot Distress Ink and also some Twisted Citron, Mermaid Lagoon, Lucky Clover and Cracked Pistachio Distress Inks to deepen the colors around the edges.


I used the We R Memory Keepers Cloud Cropadile Corner Chomper to create decorative corners on my tag.


I wanted to put a clock in the upper center half of my piece to represent time, so I stamped the Tim Holtz Weathered Clock image in Jet Black Archival Ink.


I colored some Tim Holtz Crinkle Ribbon with Twisted Citron and Mermaid Lagoon Distress Spray. I wanted the ribbon to have deep, rich color so I sprayed the distress stain on liberally.


For my sentiment, I cut out the word, "Wish", with the Tim Holtz Alphanumeric Thinlits Die from Simon Says Stamp Black Cardstock.


I put all the elements onto my tag and my "Make A Wish" project was complete.

I hope you enjoyed seeing how I put together my colorful tag. I love working with Distress Spray Stains. Their vibrant colors and excellent coverage make them a dream to work with on so many surfaces.

I can't wait to see what you create! Join us on this challenge and add your project to the Simon Says Stamp Monday Challenge Blog where you could win a $50 gift voucher to their amazing store.

For more inspiration, tips and tricks for all types of papercraft creations, follow Simon Says Stamp on:


  Image result for small facebook icon  Image result for small pinterest icon  Image result for small twitter icon  Image result for small youtube icon  


You can find all the following supplies I used to create this project at Simon Says Stamp:


Related Posts Plugin for WordPress, Blogger...