Monday, February 29, 2016

Simon Says Stamp Monday Challenge - Take A Leap Into The Unkown


Hi Everyone! I hope you all had a wonderful weekend and that you're ready for a new challenge for the Simon Says Stamp Monday Challenge. This week we're asking you to "Take A Leap Into The Unknown". Doesn't that sound fun? It was really fun for me because I always wanted to learn quilling, where you roll or incurve a thin piece of paper to create a flower or some other shape. I've seen some beautiful creations using this technique but always wondered what it would look like on a mixed media project. There are so many things you can create with quilling, but I stuck to the basics of making flowers and leaves. I'm pleased with how it turned out and the look it gave to my piece and have to admit, I had no idea how the thin layers of paper would hold up to paint and sprays so I was really taking a leap on this one. I hope you take a leap into the unknown and learn something new, maybe something that you've been afraid to try or something you just didn't think you could do well. C'mon, give it a try, you'll never know unless you do. I can't wait to see what you all create!

Remember to submit an entry and you could win in a $50 gift voucher to Simon Says Stamp's beautiful online store. Who could pass that up?

50dollar_voucher_600px


Here is my mixed media piece using quilled flowers:


I chose my surface, using chipboard, and painted it with gesso and allowed it to completely dry.


While the gesso was drying, I started quilling to create my flowers. You will need a quilling tool for this, you can find one here.  If you have Tim Holtz Tiny Tattered Florals, you already have one because a quilling tool comes with the die set. I used white cardstock because I wanted to paint and spray the the flowers once they were adhered to my mixed media piece. Cut the strips 1/8" wide and the length will depend on how large you want your flowers. Thread the end of the strip through the quilling tool making sure you go to the very end of the strip.


Now roll the strip on the quilling tool between your fingers, as shown, until you are at the end of the strip.


Carefully remove the quilled strip from the quilling tool making sure it doesn't unravel. It's helpful to have a quilling template for the next step such as the one below. This will allow you to make the same size petals for each of your flowers so they will be uniform. Place the quilled strip in the size hole for the size of flower you want to create. This will become one of your petals.


So far, your petal will look like this.


Put a tiny dot of glue at the tip of the strip and pinch together on the quilled part to form the flower petal. The inside of the quilled paper will shape on its own as you pinch the petal and the glue will keep it in this shape. Don't worry, it won't unravel.


Continue this process until you have enough petals to form a flower.


Here is another shape for petals that you can use for one of your flowers. Instead of pinching one end of the quilled strip as you glue it together, pinch both ends of the quilled strip to create a point on both ends of your flower petal.


After all your flower petals are complete, glue them together to form a flower. I used a Hero Arts pearls for the center of my flowers. Of course, you'll want to use the appropriate size pearl for the center of your flower depending on its size.


If it's more helpful, there are many videos on YouTube that can help you with the process of quilling. You can find a wonderful video here. It's for beginners, and it's one I referenced when creating my flowers.

Now that all my flowers are glued together and ready for my project, I set them aside while I stenciled and distressed the edges of my chipboard. Here, I used the Prima Flowers Sunrise Sunset Stencil and Prima's Distressing Tool


Next I adhered all my embellishments onto the chipboard piece.


I painted the entire piece with Paper Artsy Nougat Fresco Finish Paint. You can use gesso also.  Allow the paint or gesso to completely dry before moving on to the next step.


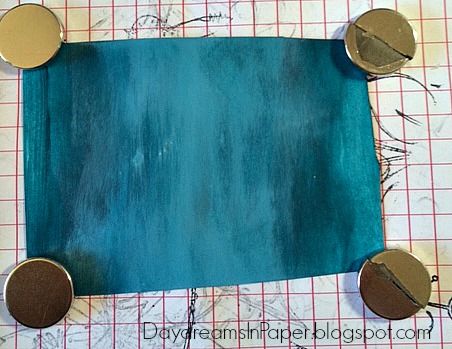
Now that the paint is dry, it's time to spray my piece. I first covered the outer edges with a cutout piece of regular paper and sprayed the piece with the Fossilized Amber Distress Spray. Then I covered the inside area and sprayed the rest of the piece with Mermaid Lagoon Distress Spray.


I let that completely dry and then added some stamping, Prima Copper Micro Beads and some distress edging with Walnut Stain Distress Ink. I also did some highlighting with a Nougat Faber- Castell Big Brush Pen for the finishing touches.

Here again is my finished project:


I hope you enjoyed seeing how I took a leap into the unknown and added quilled flowers to my mixed media project. I can't wait to see what you create!

For more inspiration, tips and tricks for all types of papercraft creations, follow Simon Says Stamp on:

Image result for small instagram icon  Image result for small facebook icon  Image result for small pinterest icon  Image result for small twitter icon  Image result for small youtube icon  

You can find all the following supplies I used to create this project at Simon Says Stamp:


Monday, February 22, 2016

Simon Says Stamp Monday Challenge - Inspired By A Song


Hi Everyone! It's that time again....time to have FUN with the Simon Says Monday Challenge. This week you're going to have a blast because the challenge is to create something that is inspired by a song. For this project, I wanted to get out some bright colored paints and cheery stamps and create a canvas because that's what I thought of when I chose my inspiration song - "Beautiful Day" by U2. I'm using mostly Paper Artsy products this week and if you aren't familiar with them, you will want to try them after you see what I created with their awesome paints and stamps. But first, don't forget you could win a $50 gift voucher from Simon Says Stamp just for entering.

50dollar_voucher_600px

Here is my "Beautiful Day" canvas:


I prepared an 8x8 canvas with gesso and let that completely dry before painting.


I used Ranger Cut & Dry Foam to blend the paints. It's a great way to blend the Paper Artsy Fresco Finish Paints. The paints I used for the grass were Hyde Park and Guacamole and for the sky I used China, Glass Blue and Mermaid.


I blended in some lighter tones of blue to make it look as though the sky had wispy clouds. I am going for a whimsical look for this project.


My grass and sky are complete and it is at this point that I add stencils and stamps to give it depth.


After completing the canvas, I began creating the flowers for my project. To get beautiful flowers with darker and lighter blended petals and centers, I brushed some Paper Artsy Fresco Finish paints in Tango, London Bus and Yellow Submarine on cardstock in a circular motion before stamping. (Make sure your paint is completely dry before stamping.) These paints dry very quickly so if you don't have a lot of patience, you're going to LOVE these paints.


The next step is to position your stamp so the center of the flower is in the lighter area.  (Paper Artsy stamps are foam mounted rubber stamps and very high quality.) After centering my flower, I'm ready to stamp. I use my Misti for stamping just in case the stamping lines aren't complete. If I need to re-ink and re-stamp I have no worries when using the Misti.


My stamping looks great and my flower is ready to cut out. (I used Archival Jet Black Ink. When using this ink, just run over it with a heat tool to make sure it's completely dry otherwise when you begin cutting out the image your ink will smear.)

You can see how pretty it will be with the yellow center and blended orange petals. (After the image is cut out, I went over the cut edge with a Copic BV29 marker so the white edges of the cut paper wouldn't show.)


Here are a few more examples of how you can paint your cardstock pieces before stamping. I was going for a whimsical look.

For my next flower, Instead of using a circular motion to paint, I brushed across and blended the colors just slightly so the flower would be a bit whimsy.


When the paint was completely dry, I went ahead and stamped my image.


I forgot to take a photo of the completed stamped flower but here is a close-up of it from my finished canvas.


If your flowers have a stem and petals, blend the colors onto cardstock in the size and shape of your stamp where you want particular colors to appear. I used back and forth strokes for this flower and then when it was completely dry I placed my stamp onto the painted cardstock before picking it up with my Misti.


Now it's time to create my butterfly. I blended three paints together on cardstock and after they were completely dry I stamped a butterfly using my Misti again.


I painted the inside of the wings with two lighter paints using a tiny paint brush.


This stamp is already whimsical but to accentuate the whimsy a bit more, I went over some of the black lines with a Uni-Ball Signo white gel pen.


I wanted to do some additional stamping onto my canvas. One of the problems that may occur when stamping onto a canvas is that the lines on the image may not be complete. Sometimes you want this effect but sometime you don't. In this case I wanted the lines to be complete and this is a case where I can't use my Misti (sigh), but have no fear. I can use a Ranger Fude Ball 1.5mm Black Pen. What I love about this pen is that it is a deep black and the 1.5mm size is perfect for this particular stamp. (Be sure to let this ink completely dry or it will smudge.) 


Often times, I will put highlights inside stamped images. Here, I add Paper Artsy Fresco Finish Snowflake paint with my fingertips. (When I was putting on the final touches for this project, I changed my mind and wanted to go with a yellow highlight center of the stamped image and around the corner so I mixed Yellow Submarine with Snowflake and used my fingertips to paint inside the image as well as around the image. You will see that in my final project.)


Here is another tip for adding some interest to a canvas. I took an old gift card and slid an edge in Black Soot Distress Paint and touched it onto the canvas to create some vertical and horizontal lines. (Distress Paint is excellent for this because of its fluidity.)


All I have left to do is adhere my flowers, butterfly and other stamped images onto the canvas with Ranger Multi Medium Matte.

Now for my sentiment, which is part of the lyrics from the song "Beautiful Day" by U2. I printed it on my laser jet printer using a font called......can you guess.....yep, you guessed it, "Beautiful Day" by artist Allyson Hirst. This font even has the same whimsical look I was going for, how amazing is that? This font is available free for personal use and you can get it here.

After printing the sentiment on white cardstock with my laser jet printer, I tore the sentiment out and inked it with Squeezed Lemonade Distress Ink and inked the edges with Black Soot Distress Ink.


I hope you enjoyed seeing the process I went through in creating my "Beautiful Day" canvas. If you haven't already, I would love for you to try Paper Artsy Fresco Finish Paints and Stamps because I know you will fall in love with them. I can't wait to see what you create!

For more inspiration, tips and tricks for all types of papercraft creations follow Simon Says Stamp on:

Image result for small instagram icon  Image result for small facebook icon  Image result for small pinterest icon  Image result for small twitter icon  Image result for small youtube icon

You can find all the following supplies at:


Paper Artsy Fresco Finish GUACAMOLE Chalk Acrylic Paint 1.69oz FF05  Paper Artsy Fresco Finish HYDE PARK Chalk Acrylic Paint 1.69oz FF50  Paper Artsy Fresco Finish CHINA Chalk Acrylic Paint 1.69oz FF101


Paper Artsy Fresco Finish GLASS BLUE Chalk Acrylic Paint 1.69oz FF102  Paper Artsy Fresco Finish MERMAID Chalk Acrylic Paint 1.69oz FF44  Paper Artsy Fresco Finish ANTARCTIC Chalk Acrylic Paint 1.69oz FF67


Paper Artsy Fresco Finish SNOWFLAKE Chalk Acrylic Paint 1.69oz FF15   Paper Artsy Fresco Finish LONDON BUS Chalk Acrylic Paint 1.69oz FF37  Paper Artsy Fresco Finish TANGO Chalk Acrylic Paint 1.69oz FF72  Paper Artsy Fresco Finish YELLOW SUBMARINE Chalk Acrylic Paint 1.69oz FF73


 Tim Holtz Distress Paint BLACK SOOT Ranger TDD36302  Paper Artsy ECLECTICA3 LIN BROWN 15 Rubber Cling Stamp ELB15  Paper Artsy JOFY 13 Loves Me Rubber Cling Stamp JOFY13  


Paper Artsy JOFY 32 Thanks Rubber Cling Stamp JOFY32  Paper Artsy JOFY 31 Thoughts Rubber Cling Stamp JOFY31  Tim Holtz Cling Rubber Stamps ULTIMATE GRUNGE Background Stampers Anonymous CMS075 Preview Image  


Tim Holtz Cling Rubber Stamps BITTY GRUNGE Stampers Anonymous CMS089 Preview Image  Wendy Vecchi Background Cling Rubber Stamp OLD WOOD FLOOR Studio 490 WVBG021  Dyan Reaveley Stencil 5 X 8 BLOCKS Dylusions DYS40651  


Ranger Wendy Vecchi Archival TIGER LILY Ink Pad AID45670  Ranger Wendy Vecchi Archival BUTTERCUP Ink Pad AID45632  Ranger Wendy Vecchi Archival DANDELION Ink Pad AID41405*


Ranger Archival Ink Pad JET BLACK AIP31468  Tim Holtz Distress Ink Pad SPICED MARMALADE Ranger TIM21506  Tim Holtz Distress Ink Pad FOSSILIZED AMBER Ranger TIM43225


Tim Holtz Distress Ink Pad MUSTARD SEED Ranger TIM20226  Tim Holtz Distress Ink Pad BLACK SOOT Ranger TIM19541  Ranger 4 Oz. MULTI MEDIUM MATTE Paint Glue INK41535


Ranger ADHESIVE FOAM BLACK IWT40507  Ranger Inkssentials CUT N DRY FOAM Cut-N-Dry Stamp Pad CND14607  MISTI PRECISION STAMPER Stamping Tool Kit


Ranger FUDE BALL 1.5 MM BLACK PEN Ohto 003082  Uni-Ball Pen Signo Gel WHITE UM-153  Copic Sketch Marker BV29 SLATE Preview Image

Tim Holtz Tonic Craft SCISSORS Micro Serrated Non Stick  
Related Posts Plugin for WordPress, Blogger...