Hi Everyone! I'm excited to share my very first project as one of Tammy Tutterow's design team members. I've been an admirer of Tammy's from afar for as long as I can remember. Her designs always took my breath away and so to say I'm thrilled to be designing for her, is an understatement! I'm humbled and honored and hope you enjoy how I use her amazing products.
My card has a base panel and a top panel. For my base panel, I stamp the Big Cheesecloth background stamp in random areas on a 5" x 7" piece of Neenah Solar White 110 lb. card stock using Potting Soil Archival Ink. I let that completely dry.
Next, I ink the edges of the panel with Ground Espresso Distress Ink using a mini ink blending tool. I set that aside to completely dry.
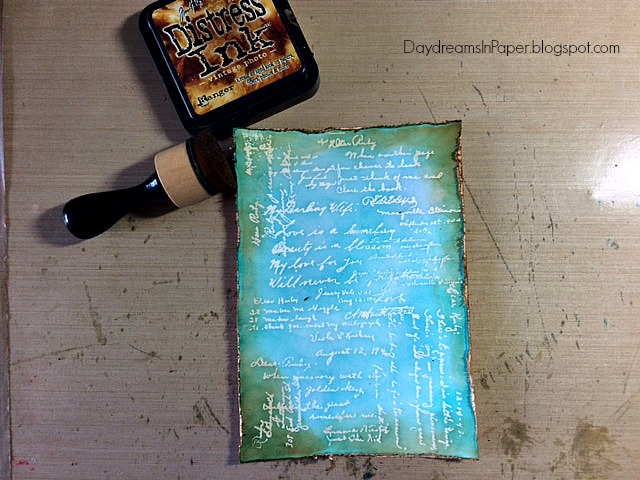
For the top panel, I stamp on the Dear Ruby background stamp onto a 4-1/2" x 6-1/2" sheet of Neenah Solar White 110 lb. card stock using embossing ink. I cover the entire panel with clear embossing powder and heat the image with a heat tool. (It's hard to see the image because it clear but you will see it in all its beauty through the next step.)
Next, I ink the panel with Peacock Feathers and Spun Sugar Distress Ink and distress the edges with a distressing tool.
After inking the entire panel, I ink the edges with Vintage Photo Distress Ink using a mini ink blending tool and set that aside to completely dry.
To create the flower, I cut 4 of the smallest size flowers from the Floweret Posies die. (I only used two of these to complete my flower.)
To color the flowers, I use a Copic BG11 and color each piece by using small outer stroke from the center of the flower out to the edge of the petal. I do this on both the front and the back of the flower.
When the flowers are dry, I use a stylus from the McGill Flower Shaping tool kit to shape the petals. You can find the McGill Flower Shaping Tool Kit here.
All the petals are colored and shaped.
Next, I make a cut between two petals on each of the flowers with a scissor by cutting to the center of the flower. (This is only to be done between one set of petals, not between all the petals.)
I shape the petals by bending them between my fingers and thumb shaping the petal around my thumb.
I create the center of the flower by putting a small dab of hot glue at the base of the petal that was cut to the center and adhere it to the petal in front of it. I go all around the flower until all the petals are attached and form a bud.
Here you can see the bud when all the petals are adhered to one another.
I continue building the flower by adhering the bud to the center of another flower.
I shape the second layer of petals using my thumb and fingers.
I adhere the petals by continuing with the same steps as completed to form the bud. This will form the second layer of petals around the bud. I set this aside and make the larger outer layer of petals.
For the larger outer layer of petals, I cut 2 of the second largest flower from the Floweret Posies die.
I color the flowers with a Copic marker in the same way as the first two flowers making sure to color both the front and back.
I count two petals and cut a slit to the center of the flower. I continue cutting until the flower is cut all the way around.
I shape the flower using a stylus by gently applying a circular motion in the center of the flower. This will cause the petals to move upward as if the flower is closing.
I shape the petals around my fingers and thumb so the two outer sides of each petal come together.
Now the larger petals are ready for me to add the smaller set of petals that were made in the first two steps.
Using hot glue, I attach the smaller flower with bud to the center of the larger petals that were just created. I continue adding larger petals to build the flower until it is the size I want.
I use the tweezers that come in the McGill Flower Shaping Tool Kit and grab a single petal between the tongs of the tweezers.
Now gently, I curl the petal around the tweezers to form and shape the flower to make it look more realistic.
Here, you can see my completed flower.
I want to add some shimmer and glitter to my flower, so I put some glossy accents on my finger tip to apply a small amount to the tips of each petal. While the glue is still wet, I sprinkle Distress Stickles Dry Glitter Rock Candy over the flower and shake off the excess.
Here is my completed flower with the pretty glitter. These are really easy to make and even though it seems like a lot of steps and that it will take a long time, once you create the first one all the others will go very fast.
To create the petals for my flower, I use the Pom Pom Posies die set and color the leaves using a mixture of Peeled Paint Distress Stain and water.
I dry the leaves completely with a heat tool and dip a second time to create color variation on the leaves. I allow the leaves to completely dry.
I ink the edges with Vintage Photo Distress Ink using a mini ink blending tool.
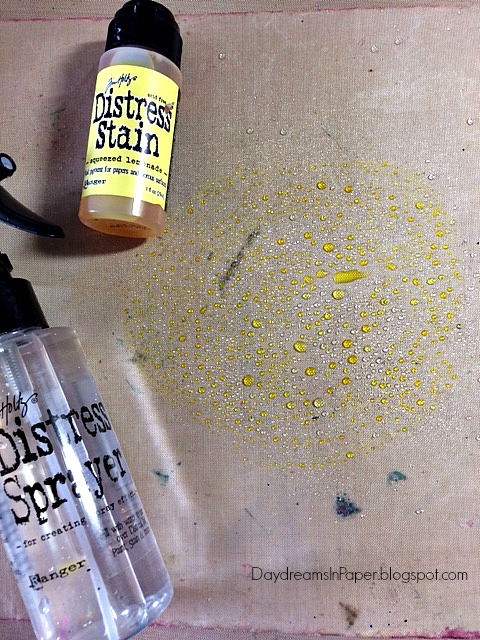
To color the ribbon for my bow, I create a mixture of Squeezed Lemonade Distress Stain and water on a craft mat.
I dip my ribbon in the ink and water mixture and let that dry. You can use a heat tool to dry your ribbon.
I continue to dip the ribbon into the ink and water mixture until I'm pleased with the amount of color and variation of the color on the ribbon. I completely dry the ribbon with a heat tool making sure I'm crinkling the ribbon in my hand as it dries.
I want the ribbon to look aged, so I make a mixture of Vintage Photo Distress Spray and water onto a craft sheet and dip random areas of the yellow ribbon into the mixture. To form your bow, I have created a step-by-step tutorial that you can find here.
To finish my card, I attach my ribbon and bow to the top panel. I then attach the top panel onto the bottom panel using Scotch 3D foam tape. I attach a dangling metal jewel piece from the center of the bow and adhere the flower and leaves on top. This completes the card.
I hope you enjoyed seeing how I created my card. If you have any questions, please don't hesitate to contact me.


Cathie, Thank you for the beautiful card and full instructions! We're all going to enjoy you very much!
ReplyDeleteI'm so happy you enjoyed seeing the process for my card and thank you for your sweet comment.
DeleteCathie ♥
This is so beautiful and your instructions are very clear.Thank you.
ReplyDeleteI'm so happy you enjoyed the instructions. I enjoy showing how some of the elements were created on my projects. Thank you for your sweet comment.
DeleteCathie ♥
This is an amazing project! LOVE everything about it and the colours and the paper rose and the... everything. Thank you for sharing! Oh and you do grrrreat tutorials, easy to follow for us beginners!!! Thanks again.
ReplyDeleteThank you for taking the time to leave such a sweet comment and I'm so happy you enjoyed the tutorials.
DeleteCathie ♥
Such a beautiful card ,I love the colour combination . Thank you for the full tutorial!
ReplyDeleteThank you for your sweet comment.
DeleteCathie ♥
Oh My Goodness, what a lovely card and fantastic tutorial. Cant wait to see more of your lovely work!!
ReplyDeleteThank you so much, Ann. I'm so happy you enjoyed my card and tutorial. Your sweet comment means a lot to me.
DeleteCathie ♥
this card is AMAZING!! Your tutorial is fabulous!! Very easy to follow. I have to say that I thought the flower was a purchased one...and the ribbon I thought was raffia! AMAZING!!!!
ReplyDeleteThank you so much, Theresa, for your sweet comment! I often wonder if my tutorials are written clearly, so hearing your comment made me really happy!
DeleteCathie ♥