

Hi Everyone! I hope you all had an amazing weekend and that you're ready for a new challenge on the Simon Says Stamp Monday Challenge. Our theme this week is Trio-tastic. It's a challenge where we ask you to use three of something on your project. Let your imagination run wild and join in the fun! I can't wait to see what you create.

I created a mixed media panel using three things in several areas. I used two paint colors and when I rubbed over the two colors with a baby wipe it resulted in a third color. I added two sets of images and stamped three of them on my painted panel. I used three die cuts in my background and lastly, I used three butterflies as the focal points on my panel. Below you will see step by step photos and instructions on how I created this mixed media panel. I hope you enjoy it!

I start creating my mixed media panel by cutting a 6" x 8" piece of white chipboard and cover the entire piece with Dina Wakley White Gesso.

I paint in different directions in random areas using Dina Wakley Heavy Body Acrylic Paint in Lapis. I allow the paint to completely dry before moving on to the next color.

When the Lapis paint is dry, I paint over all the white areas with Dina Wakley Sky acrylic paint.

I paint over the areas of Lapis paint again to deepen the color and I brush the Sky paint around the Lapis making sure to gently brush over some of the edges of the Lapis paint to soften the lines left behind.

When my panel is almost dry, I wipe over the entire panel with a baby wipe. As you can see, a third color results when doing this. I wish I could tell you why, but I don't know why, I just know that it's cool. A light purple or violet color results under the Lapis paint when wiped over with the baby wipe for some reason, and it's really pretty.

Next, I add some images to my background. I chose the star with numbers from the Dina Wakley Grungy Stars stamp set. I stamp three of them in random areas on my panel with Jet Black Archival Ink.

I stamp the large circles from the Dina Wakley Textures stamp set to my panel in three random areas with Cornflower Blue Archival ink.

Next, I add three Memory Box Square Links die cuts to my panel and adhere them with Ranger Multi Matte Medium.

When the panel is completely dry, I cut off the pieces of the die cut that are hanging over the edge of my panel.

I edge the entire panel with Black Soot Distress Ink using a mini ink blending tool.

I brush some Dina Wakley Gesso onto my craft mat and pick up some of the gesso with a dry paintbrush. I want to lighten areas of my panel where I will place the butterflies to make them stand out, so I dry brush gesso in those three areas.

Here is my finished background. You can see how I lightened the areas where I will place my butterflies. I set that aside to completely dry.

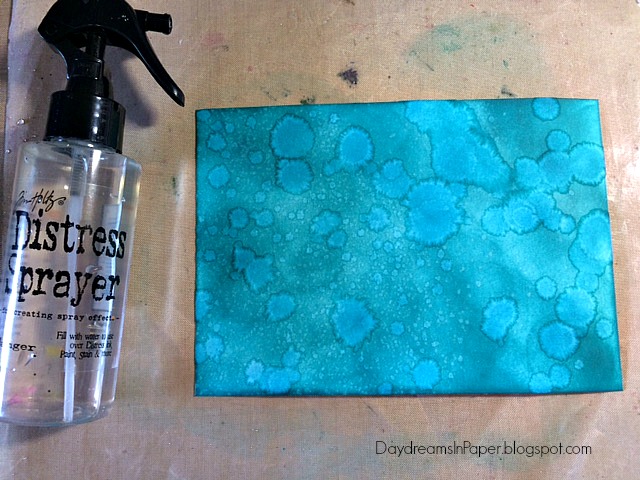
To create the butterflies, I ink a piece of Neenah Solar White 110 card stock with Seedless Preserves Distress Ink using a mini ink blending tool. I want some areas to be darker than others, so I apply the ink with the blending tool applying medium pressure. This will allow the edges of the tool to create the darker areas.

After the entire area is inked, I spray on water with the Tim Holtz Distress Sprayer. This is a wonderful sprayer because it allows you to spray a mist as well as large drops of water depending on the amount of pressure you use when squeezing the handle.

I use the Tim Holtz Thinlits Detailed Butterflies die set to cut out the base of my butterflies.

Here is a close-up of the butterfly bases.

I cut the detailed wings out of black card stock.

To create my third butterfly, I ink another piece of white card stock with Peacock Feathers Distress Ink using a mini ink blending tool.
I spray water over the entire piece of inked card stock just as I did for the first two butterfly bases.

Here, you can see a close-up of my third butterfly after the detailed wings have been attached.

I add Enamel Accents in Caribbean Coast, Black and Blue Ribbon by clustering them in three dots in random areas on the panel. I add three dots of White Enamel Accents to the centers of the butterflies and added the sentiment to finish off my project.

I hoped you enjoyed seeing the process I used to create my Trio-tastic mixed media panel. Please join us in all the fun and add your project to Simon Says Stamp's Monday Challenge Blog for your chance to win a $50 gift voucher to their amazing store.

For more inspiration, tips and tricks for all types of papercraft creations, follow Simon Says Stamp on:


You can find all the following supplies I used to create this project at Simon Says Stamp:


What a fabulous painty and inky background! I LOVE the tones, and love the step out photos. The memory boxes look like a matrix, and love the butterflies all around. Gorgeous and artsy piece!
ReplyDeleteThanks, Anita!
DeleteCathie ♥
You did so good, how cool! Love your funky project for this week's challenge. Hugs, Autumn
ReplyDeleteThanks, Autumn!
DeleteThis is amazing Cathie! I love that wonderful background, all the paint, and those cool squares.
ReplyDeleteThis panel has stolen my heart. The background is just amazing, the colors are perfect and match so well together. The third color is my fave :-) maybe you should patent it! No matter how it appeared, it's important it was there below screaming to be descovered :P The square die is fabulous, I have never seen it before! It goes for my wish list. Hugs, Marzena
ReplyDeleteWow, Cathie! This is gorgeous! Love, love the rich colors and wonderful textures! Your butterflies are beautiful and the saying is perfect. I now have to go find some Lapis! Happy Thanksgiving! Maura
ReplyDeleteHow stunning, Cathie! I love how you made the background :)
ReplyDelete*mwah*
Steph
Simon Says Stamp!
wow this is stunning Cathie...love the gorgeous background which sets off the gorgeous butterflies beautifully...hugs kath xxx
ReplyDeleteLove seeing your process & use of the links die cut--gorgeous butterflies!
ReplyDeleteSuch a fabulous creation, Cathie. I love the beautiful colors on the background and the those butterflies are gorgeous. :)
ReplyDeleteCAthie you're so creative!!! Love so much your use of squares! FAbulous work stunning colors! barbara
ReplyDeleteI LOVE the background of this and the butterflies look amazing against it...wonderful work as always, Cathie! <3
ReplyDeleteThis is such a delightful little piece of art! I love how vibrant the colors are, yet it is so classy! I have been eyeing that square link die, so it was a treat to see it used. I really like how striking it is to see the geometric shapes paired with the elegant butterflies. Another masterpiece!!
ReplyDeleteWow this is so pretty, Cathie! Love the funky colors and the squares give it such a fresh look. Fabulous piece! Hugs, Sandra
ReplyDelete