
Please welcome our guest designer this month, Alison Bomber and hop on over to the SSS Monday Challenge Blog to see the rest of the design team's amazing inspiration.


Join me for a step-by-step tutorial on how I created the background and flowers for my "Summer Garden" panel.

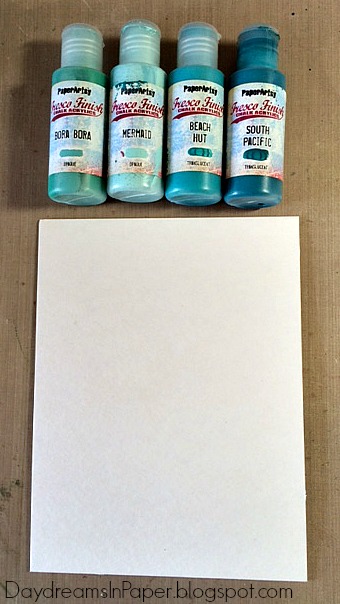
I cut a 6x8 white chipboard panel and chose 4 coordinating Paper Artsy Fresco Finish Paints.

Apply a small amount of paint onto your craft sheet and load the paint onto a brayer by rolling it through the paint. Next, apply the paint to the panel by rolling it onto the chipboard in random directions, (top to bottom and left to right).

Continue this process with each paint color paying attention to whether the paint is translucent or opaque. Each bottle is clearly marked whether it is translucent or opaque.
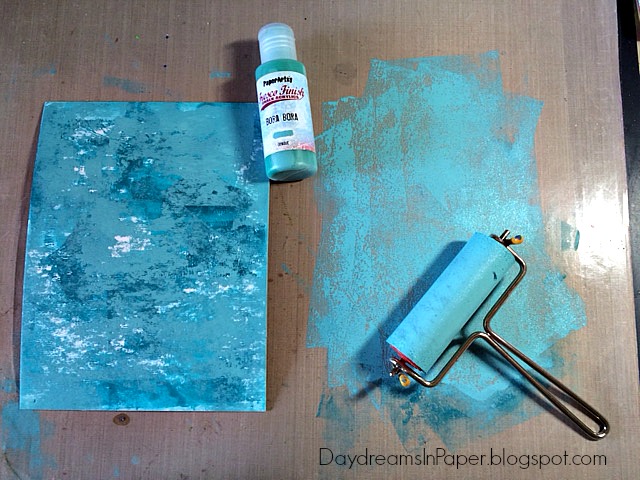
Here, I added an opaque color to begin the process of creating depth.

I continue to add another layer of opaque paint in a slightly lighter shade. After this layer is dry, I go back to the two translucent colors and layer them on top until I'm pleased with the background.

I want to begin adding images that will appear softly and subtly in the background. Staying with the same paints as my background, I choose one of the light opaque paints and load a piece of Ranger Cut-N-Dry Foam with the paint. I then gently dab that onto the stamp.

Here you can see how beautiful this process transfers to my background; blending in ever so slightly.

I add more interest using a background stamp with Paper Artsy Fresco Finish Snowflake paint.

I continue adding more images to the background until I'm pleased with how it looks. At this point, it's important to stick with the translucent paints.

I add a few more images with Ranger Archival Garden Patina and Fern Green Ink. After I'm pleased with the background, I set it aside to completely dry. The fresco finish paints dry very, very quickly but the archival inks will take a bit longer to completely dry.

Here, I'm creating the background from which I will stamp my flowers. I used 3 coordinating colors of Paper Artsy Fresco Finish Paints and, as you can see, followed the same process as when I created my background for the main background panel.

I'm happy with my background and the depth of colors for my flowers.

I stamp the flowers onto this background with Ranger Jet Black Archival Ink. I stamped two images because I will be creating layers to my flowers so they have dimension on my completed project.

I return to my main background after it's completely dry and add some snowflake paint to create a lighter background where I stamp my flowers. This will highlight the area for my floral focal point.

I fussy cut out the flowers that I created from the other background and used a stylus on one of them to give it some dimension so it would pop off the panel.

I adhere the two flat flowers directly over the stamped image on my background with Ranger Multi Medium Matte and apply the dimensional flower on top of that for the dimension. To adhere the dimensional flower on top of the flat one, I dab a bit of multi medium matte onto the back center of the dimensional flower.

I added some Prima Micro Beads to the center of my flowers.

I wanted to add a larger, lighter colored flower to the panel just above the two smaller ones. I created a simple background using a mini distress tool with the paints and applied them in a circular motion onto the card stock. I applied the darker paint to the center.

When the paint was completely dry, I stamped my image onto the painted area making sure the center of the flower would be in the darker area. I used my Misti to get the stamp right where I wanted it. I made two of these and applied them to my panel in the same way as I applied the two smaller flowers.

I added some small black beads to the center of my pink flower and added a stamped border in two of the corners of my panel. I then distressed the edges all the way around with Black Soot Distress Ink. I then added my sentiment to complete my "Summer Garden" mixed media panel.
Here again is my completed project.

I hope you enjoyed seeing how I created my "Summer Garden" panel and that you join us this week in all the fun. Add your project to the Simon Says Stamp Monday Challenge Blog and you could win a $50 gift voucher to their amazing store. I can't wait to see what you create!

For more inspiration, tips and tricks for all types of papercraft creations, follow Simon Says Stamp on:


You can find all the following supplies I used to create this project at Simon Says Stamp:


