

Hi Everyone! Thank you so much for stopping by. Today I created a fun gift card holder using some of Tammy's amazing products and it's like giving a gift in a gift. I hope you enjoy the tutorial I put together and that you get some inspiration to help you create beautiful gift card holders.


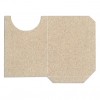
I begin by cutting the Tammy Tutterow Scoop Pocket Die from Neenah Solar White 110 lb. card stock.

I will be layering three different shades of blue on the pocket by going over the pocket with a mini ink blending tool beginning from the outer edges. I begin my first layer using Faded Jeans Distress Ink. This is the lightest of the three shades of blue so I will apply this color on the entire pocket going from heavy pressure around the edges to lighter pressure as I get to the center of the pocket.

The next layer is Stormy Sky Distress Ink. You can see the depth of colors coming together. This color is applied from the outer edges to about 1/3 of the way to the center.

Now for the final color, Chipped Sapphire Distress Ink. This really deepens the edges and gives some beauty and depth to the pocket. This color is applied to the edges only going in as far as the width of the blending tool.

When the Distress Inks are dry, I ink on the Tammy Tutterow Dear Ruby stamp in random areas of the pocket with Memento Tuxedo Black Ink. I set this aside to dry while I make the flower for the gift card holder.

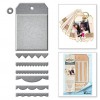
I want to create a frayed flower so I cut out five of the largest flower petals from the Tammy Tutterow Frayed Posies die set. I only use three of them to create the flower for the gift card holder, but I always cut a few extra in case I ruin one of them or want to create another flower that I will use on a future project.

I fray the edges even more with a Tim Holtz Paper Distresser.

Next, I ink the center of the flower petals with Spun Sugar Distress Ink.

I shape the petals using the McGill Flower Shaping Tool Kit.

To create the flower, I use three of the petals and adhere them one to another starting at the bottom and offset each petal while I add them.

I always like to experiment with different ways to create flowers. This time I chose to use the tag enforcer from the Tammy Tutterow Shortie Tags stamp set to create the center of the flower. I ink a small piece of scrap Neenah Solar White 110 lb. card stock with Fossilized Amber Distress Ink and cut out the flower center from the inked piece.

I take a small bunch of flower stamens and fold them in half. I push the folded stamens through the hole in the tab center and apply some hot glue around the bottom of the tab where the flowers just come out from the hole. When the hot glue is dry, I cut off the white part of the stamens so the flower center so it will lay flat in the center of the flower.

I glue the flower center I created to the center of the flower. The center doesn't lay completely flat which gives it more dimension. I'm not sure I like this flower center or would use it again but it was fun to experiment.

To create the tag for my gift card holder, I use the Tammy Tutterow Flower Bouquet Stamp set and color the image using Copic markers R81, R83, R85, B93, B95, B97, Y19, YR21, YR23, YR24, YG61, YG63, YG67, C1 and the Colorless blender to blend the gray area around the bouquet.

When the image is finished, I ink the edges around the image with Spun Sugar Distress Ink.
Below are some closeups of the gift card holder. I attached the gift card to the back of the tag.

After assembling the scoop pocket, I adhere the flower with some delicate stems from the Cheery Lynn Mini Fanciful Flourish die set and add a Tim Holtz Buckle.

I adhere the colored image to My Favorite Things pink polka dot card stock and create a decorative edge using the Crop-A-Dile Corner Chomper Scallop edge. I tie some pretty lace ribbon to the top of the tag and adhere the gift card to the back of the tag.


I hope you enjoyed seeing how I put together this beautiful gift card holder and that you were able to get some inspiration for your next project. Thanks so much for sticking with me to the end. I really appreciate it!!


Love this card. Interest wag to use a tag. Love tags.
ReplyDeleteAbsolutely beautiful!
ReplyDeleteWhat a gorgeous showcase of Tammy's beautiful designs, Cathie! Beautiful work, you've inspired me!
ReplyDeleteCathie, this is simply divine! I love your color choices. The frayed posy is gorgeous, and that tip for using the reinforcment tab is pure genius. As always, your inking is impeccable. What a wonderful tutorial. Thank you!
ReplyDeleteBeautiful....Love the step by step instructions.
ReplyDelete