

Hi Friends! It's that time again, time for another fun and amazing challenge on the Simon Says Stamp Monday Challenge blog. This week our theme is, Hip Hop and we're asking you to choose between a music theme or incorporating a rabbit to your project. I chose to go with the rabbit to create my burlap panel. I've included a small tutorial below that contain some of the elements on my project. I hope they inspire you to try something new or recollect a technique you may already know. Enjoy!
Also, don't forget to stop by our lovely guest designer for the month of April, Amy, from Amy's Card Obsession. You won't be disappointed with her amazing talent.


First, I created the watering can for my project using the Tim Holtz Watering Can die set. I colored the can with Pumice Stone Distress Ink using a mini ink blending tool as shown above.

I then created a little masking piece with a post-it note and cut out a small space at the top for the handle of the watering can so I could ink it a darker color.

Here you can see the result of creating a darker handle I colored with Hickory Smoke Distress Ink using a mini ink blending tool.

The die set comes with a separate center piece for the middle area of the watering can. I chose to color this piece with Fossilized Amber Distress Ink and adhere that to the center of the watering can. I then ink all the edges with Black Soot Distress Ink and splattered Black Soot Distress Paint onto the can using the Tim Holtz Splatter brush.

I cut the background piece for the panel from the Tim Holtz Vintage Cabinet Card and using a brayer, I roll on some Paper Artsy Smurf Fresco Finish Paint. When using the brayer, be sure to roll and lift, do use a back and forth motion. Be sure to leave some areas uncovered. Allow that layer to completely dry.

Now that the first layer is completely dry, I roll on some Paper Artsy Blue Oyster Fresco Finish Paint using the same brayer technique as the first layer. Allow this to completely dry.

Next, I add some stenciling with the Dina Wakley Plastic Canvas stencil and apply that on my background with Paper Artsy China Fresco Finish Paint. I use a small sponge and a dabbing motion to apply the pattern. You do not need much paint at all, so make sure you don't put too much paint on the sponge or it will ooze underneath the stencil creating a blurry image.

Here, you can see the background before I move on to the next step.

Next, I completely cover the background with Black Soot Distress Ink using a mini ink blending tool. I allow that to sit on top of the background for a few seconds and then wipe all the black ink off with a baby wipe.

Here is a close-up of the background so far. You can see where the ink was left behind after wiping. This happened because I made sure not to completely cover the piece with paint. The areas that were left uncovered picked up the ink and created a cool effect.

Next, I stencil on the Tim Holtz Flourish Layering Stencil with Dina Wakley White Gesso.

To complete the background piece, I use Black Soot Distress Paint with a dauber top and run it along the edges.

A fun way to color flowers is to use watercolor markers. I use Winsor & Newton Cadmium Orange (060) and Gamboge Hue (266) and color onto Bristol watercolor paper centers of the flowers with one color and petals with the other color. I blend the colors together with a waterbrush or you can use a paint brush dipped in water if you don't have a waterbrush.

I use the Tim Holtz Small Tattered Florals die set and cut out each piece as shown above on a die cutting machine.

Here are the cut out flower petals. I turn them over and color the back side also.

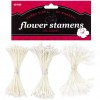
I punch a 1/8" hole in the center of the petals with a hole puncher so I can build the flowers around some stamen stems.

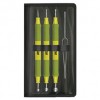
Before adding the centers, I shape the petals with McGill Flower shaping tools and add the stamen centers. I also cut a few of the leaves. The leaves are colored with Peeled Paint and Forest Moss Distress Ink.

I keep the burlap panel simple by adding some Dina Wakley White Gesso in random areas on the top and sides of the burlap and allow that to completely dry.

To complete the panel, I dabb on some Broken China Distress Paint along the edges of the burlap panel and adhere the background piece onto that. I create the bunny from the Tim Holtz Bunny Sketch stamp which I color with Derwent Inktense watercolor pencils and fussy cut the bunny out of the sketch. I add an Easter egg from the Simon Says Stamp Some Bunny stamp set colored with Winsor & Newton watercolor markers. I adhere the watering can to the panel and a Tim Holtz Word Band with twine to the bottom. I then add the flowers I created and the "happy easter" sentiment from the Tim Holtz Seasonal Chit Chat stickers. I added some lines for interest around the top sentiment with a Signo Uniball White gel pen. I also add some metal pieces colored with Black Soot and Broken China Distress Paint to the top left and bottom right of the panel,
I hope you enjoyed seeing the process I used to create my Hip Hop project and that you join us for this fun challenge by adding your project to Simon Says Stamp's Monday Challenge Blog for your chance to win a $50 gift voucher to their amazing store.

For more inspiration, tips and tricks for all types of papercraft creations, follow Simon Says Stamp on:


You can find all the following supplies I used to create this project at Simon Says Stamp:


This is so beautiful, Cathie! The process of making the background is always my favourite part of your posts. Love to see how much work is in it. Lovely colors and cute flowers, all this makes the project so spring calling! Lovely! Hugs, Marzena
ReplyDeleteStunning piece, Cathie! I love the bright happy pops of fossilized amber :)
ReplyDelete*mwah*
Steph
Simon Says Stamp!
Awesome little canvas, Cathie! Love how you stenciled on top of stencils to create that gorgeous background! The dark outlining really adds a wonderful touch to this! Happy Easter! Maura
ReplyDeleteWOW! A beautiful masterpiece!!
ReplyDeleteHave a wonderful day,
Migdalia
Crafting with Creative M
Such a gorgeous canvas which is the epitome of spring and Easter...it's just adorable Cathie and I love every single detail of this project! <3
ReplyDeletebeautiful canvas Cathie...perfect for Spring and Easter...wishing you a Happy Easter weekend...hugs kath xxx
ReplyDeleteLove this panel Cathie! Thank you so much for your sweet comment...Happy Easter! Hugs xxx
ReplyDeleteThis is lovely Cathie! The orange flowers are so pretty and I love the watering can and the bunny peaking out behind it. Gorgeous background too.
ReplyDeleteI forgot to say, Happy Easter!
ReplyDeleteBeautiful canvas!!!!!!!!!!
ReplyDeleteLovely canvas! Flowers are stunning as always and the background fantastic!Happy Easter to you and your family! Barbara
ReplyDeleteLove this gorgeous creation, Cathie. The layered embellishments and flowers are fabulous! :)
ReplyDeleteThis is such a great project! I'm always impressed at how many techniques you employ in your artwork and I really like the color combo you chose. Those flowers are amazing, too!
ReplyDeleteThis is amazing, Cathie! Love the step by step to see the proces and all the techniques. So pretty! Hugs, Sandra
ReplyDelete