It's the most wonderful time of the year! Yep, it's Christmas time and it's also time for 5 for Friday with Tammy Tutterow Designs. I used two of Tammy's new Christmas stamps to create some fun gift card holders. You can find all the new stamps from her Christmas collection here. Below I have provided step by step photos and instructions in case you're interested in creating these gift card holders or just to give you some inspiration to create your own designs. Hope you enjoy!!
I cut two Tammy Tutterow Scoop Pockets out of Neenah Solar White 110 lb. card stock.
For the first pocket, I stamped the Be Merry stamp onto the front of the pocket. I offset the stamp a bit and picked it up with the Misti stamping tool. By using this tool, I can perfectly place the stamp where I want it to go on the pocket and then pick it up with the folding stamping block. I re-stamp the image until I'm happy with the transfer making sure all the lines are stamped well.

I use Copic markers YG25, YG63 and YG67 to color the leaves.

To color the letters, I use Copic markers R35, R46 and R59.
I outline the letters and color the star using Copic markers BG000 and BG01.

I color the berries using Ranger Enamel Accents. This gives the berries a cool dimensional look. I also paint the stars with Brushed Pewter Distress Paint.

When everything is completely dry, I ink the edges of the pocket with Vintage Photo Distress Ink.
For the second pocket, I stencil the Holiday Knit stencil onto the front of the pocket with Studio 490 translucent embossing paste.

Here you can see how the stenciling turned out. (I bet you an also see where I accidentally touched it with my finger before it was dry.) It's okay though because I will cover that area with a mitten.

When the embossing paste is completely dry, I ink the entire pocket with Peeled Paint Distress Ink.
To create the mittens, I stamp them onto Neenah Solar Whtie 110 lb. card stock using the Misti tool.

I want to create an effect with Copic markers on the mittens so I stamp the mittens again but this time I stamp them onto Inkadinkadoo Masking Paper. I cut out the hearts and the cuffs of the mittens so I can place those pieces over the stamped mittens on the card stock.

I color the mittens using Copic markers E31, E35 and E57. I place the masked heart and cuff onto the colored mitten. I then take a textured towel, apply some rubbing alcohol in a small area of the towel, and dab the mitten over the colored area with the wet towel. This creates a textured look on the mittens.

Here, you can see the effect the technique leaves behind up close.

Here, you can see the completed mittens after using this technique.

I remove the masked hearts and cuffs and now I'm ready to add texture to the cuffs.

To create texture on the cuffs, I dab Prima Snowflake Paste onto the cuffs using a small paint brush. I set the mittens aside to completely dry.

When the snowflake paste is completely dry, I fussy cut the mittens. I go around the edges of the mittens with the edge of a Copic marker BV29. This will cover the white edges after cutting out the mittens. To complete the mittens, I add two tiny buttons with a burlap twine bow.
I cut a piece of crinkle ribbon for the bow and use Peeled Paint Distress Stain to dye it. I completely dry that with a heat tool and crinkle the ribbon in my hands as I'm drying it.

When the first coloring is completely dry, I add Vintage Photo Distress Ink and water to add a vintage look to the ribbon. I dry it completely using the same process as above.

I want the ribbon to have some darker tones, so I add Forest Moss Distress Ink mixed with water to the ribbon. I completely dry the ribbon again.

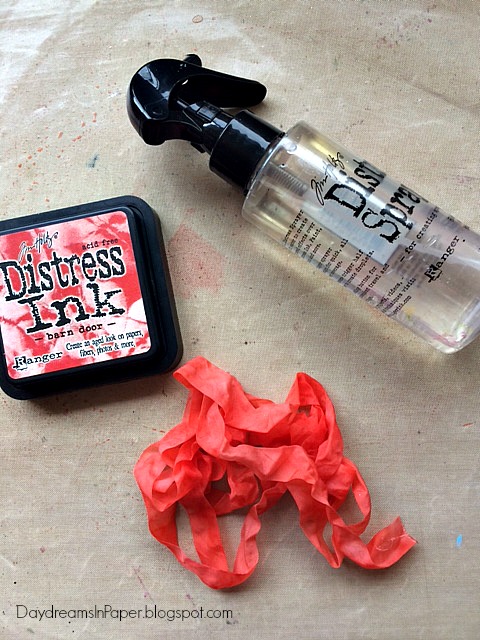
For the red bow, I use the same process as above starting with another piece of crinkle bow and use Barn Door Distress Ink mixed with water for the first color. I completely dry the ribbon before adding the next color.

To give the color some rich, deep red tones, I add Fired Brick Distress Ink mixed with water and then completely dry the ribbon.
If you are interested in seeing how I create my shabby bow, I have a full tutorial here.
I create the tags with the Tim Holtz Tags & Bookplates die set using his Tidings paper stash collection. I attach the bows to the top of the tags and add the gift cards to the bottom of the tags using glue dots. These tags are the perfect size and slip perfectly into Tammy's Scoop Pocket dies.
Here again you can see the Christmas gift card holders I created using her amazing stamp sets and dies. I hope you enjoyed seeing how I created these adorable gifts. Don't forget to pop over to Tammy's blog to see all the other designer's projects for more inspiration and thank you so much for hanging out with me today!!


