


I wanted to create some underwater coral rock pieces and thought that if I applied Paper Artsy Grunge Paste to a piece of corrugated cardboard I could stamp it, spray it with Distress Ink and let it completely dry. Once the paste was completely dry, I could then chip it off in pieces that I could use on my project. Let's see if this will work.....

I applied the grunge paste to the cardboard.

I lightly spritzed the IndigoBlu Bubbles Background stamp with water, so it would easily release from the grunge paste, and stamped the image onto the wet grunge paste. I then removed the stamp and let the paste completely dry.

When the grunge paste was completely dry, I sprayed it with Mermaid Lagoon and Cracked Pistachio Distress Spray and let that dry. When the sprays were dry, I wiggled the cardboard in random areas so the dried grunge paste would crack. I peeled away the cracked pieces from the cardboard and had the pieces of coral rock for my project. (Note: Using corrugated cardboard makes it much easier to peel the pieces away from the paper backing in chunks.)

Here are the coral rock pieces for my project.

Here, I'm creating the background for my panel which you may have seen me explain in previous projects. Here in three easy steps, you can see what I've done to create my background.
1. Cut a piece of 6" x 8" white chipboard and completely cover it with one layer of gesso. Let that completely dry.
2. Sprinkle on small amount of Paper Artsy Infusions Powder Pigment. (I used Royal Blood and A Bit Jaded.)
3. Go over the panel with Ranger Texture Paste. (I used the transparent gloss finish because I wanted it to have a shine once it dried.

I added some white areas to some of the bubbles with Paper Artsy Snowflake Fresco Finish Paint and some dimension to other bubbles using Ranger Glacier White Enamel Accents.

Here, you can see where I've added all the white bubble areas.

I created another type of coral from the Tim Holtz Bird Branch die set. I die cut the image out and cut the bird off the branch. I then inked it with Abandoned Coral Distress Ink, sprayed it with Abandoned Coral Distress Spray and then inked the edges with Vintage Photo Distress Ink.

This is another idea I had to create texture and some areas of resist on a die cut piece. I used this process for my starfish and sea horse. First, put a small amount of Ranger Ultra Thick White Embossing Enamel in a small container for mixing (you can use clear enamel instead of white also).

I added some white sand and colored with Latte Adirondack Alcohol Ink. The formula is one part ultra thick embossing enamel to two parts sand. Mix thoroughly.

Brush Ranger Multi Medium Matte glue onto the seahorse and apply the enamel and sand mixture to the glue while it's still wet.

As soon as the enamel and sand mixture are applied to the seahorse, I heated it with a heat tool until the enamel bubbled. The sand and enamel will harden once they cool. (Note: The sand will not flake off because it melds with the enamel.) One thing that's cool about using the enamel is that it will act as a resit to any ink you apply.

When the enamel and sand are completely dry, I spray the seahorse with Fossilized Amber Distress Spray.

Here is the completed seahorse.

I also created a couple of starfish using the same process to texturize it as I did with the seahorse.

I created the eye for the seahorse on my craft sheet with Ranger Black Enamel Accents. Do not apply this directly to the seahorse as it will spread and create a deformed eye because of all the texture.
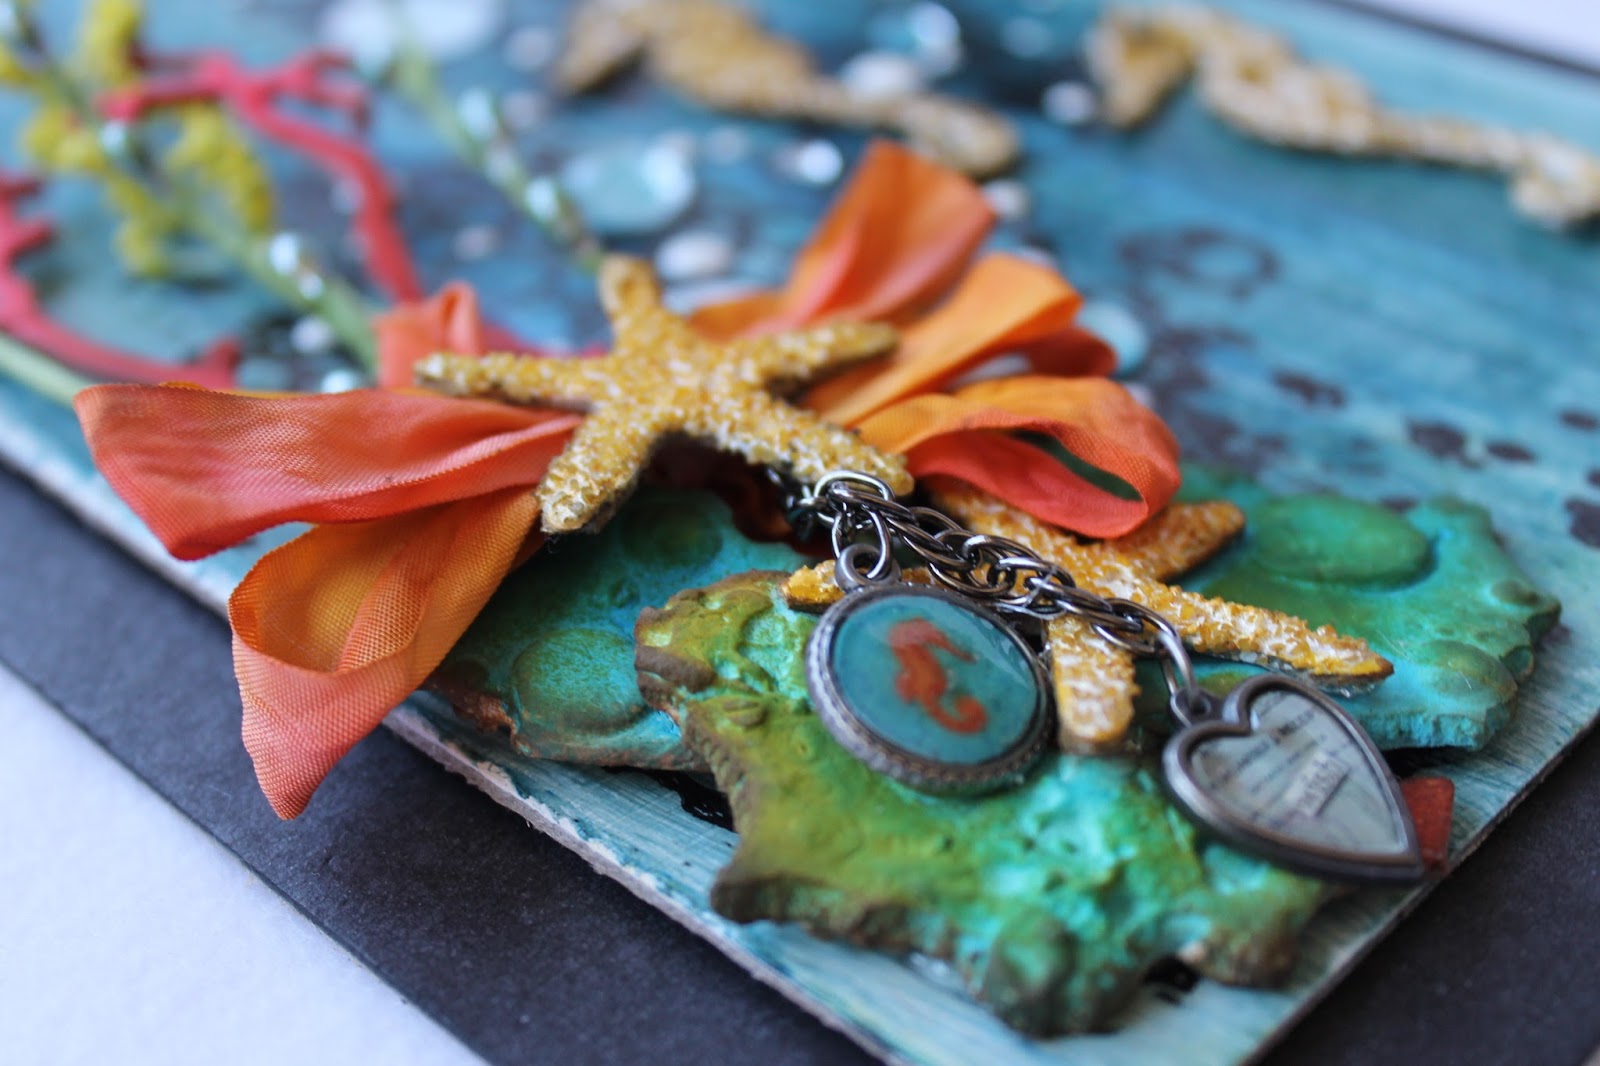
I added some Prima Melange pieces to some of the bubbles, a few floral pieces from my stash and a couple of starfish and a ribbon colored with Abandoned Coral and Fossilized Amber Distress Spray. I also added an Idea-ology Heart Charm and Charmed metal piece on a chain.

Here are more pictures up close so you can see more of the texture and elements.


I hoped you enjoyed seeing the process I used to create my Seahorse mixed media project representing our Go Fish theme. Please join us in all the fun and add your project to Simon Says Stamp's Monday Challenge Blog for your chance to win a $50 gift voucher to their amazing store.

For more inspiration, tips and tricks for all types of papercraft creations, follow Simon Says Stamp on:


You can find all the following supplies I used to create this project at Simon Says Stamp:


Gorgeous panel Cathie, the background is fabulous, I love how you textured the coral, and the seahorse and starfish are stunning, I love how you made those :-) the whole design id absolutely beautiful :-)
ReplyDeleteluv
Lols x x x
Thanks, Lols.
DeleteCathie ♥
that should say 'is' ;-)
ReplyDeleteAmazing texture and colour! I love how you achieved the texture too - the bubbles look fantastic and I love your starfish and sea horse. What a genius way to make your seaweed too! Hugs, Chrisx
ReplyDeleteThank you, Chris!
DeleteCathie ♥
woah that is fantastic!!!!!! Going to try your techniques!!! Love it!!
ReplyDeleteThanks so much, Zoey!
DeleteCathie ♥
LOVE this, Cathie! It's especially great how you popped out colors for extra dimension and details!
ReplyDelete*mwah*
Steph
Simon Says Stamp!
Thanks, Steph!
DeleteCathie ♥
Wonderful piece, Cathie! Love it! The texture is amazing and what a fabulous tutorial! Hugs, Sandra
ReplyDeleteThank you, Sandra!
DeleteCathie ♥
Love you creation! The background is awesome! I love the detail you added to the seahorses and the white dots. Amazing!
ReplyDeleteThank you for taking the time to stop by and leave your sweet comments.
DeleteCathie ♥
OMG! This is gorgeous, Cathie! I love the brilliant colors against the black and white, and that bubble stamp, oh, i want that! Your textures are amazing, they look so real! LOVE this!! hugs, maura
ReplyDeleteThank you, Maura!
DeleteCathie ♥
This panel is totally stunning! I love the background made with Infusions, great deep colors. Amazing technique applied on sea horses! The branch popps up perfectly with this coral shade. Great job! Hugs, Marzena
ReplyDeleteThank you, Macarena!
DeleteCathie ♥
Reading how you did this project is amazing. The varieties of coral, the enamel accent for the seahorse eye (but don't apply directly!) - every detail is so instructive. It is a great project with excellent instructions. Thank you.
ReplyDeleteThank you so much, Lucy! It means a lot that you took the time to stop by and leave your sweet comments. I really appreciate it and I'm so happy you enjoyed this project!
DeleteCathie ♥
wow...this is amazing...you have totally rocked that Infusions background...love everything about this gorgeous project...hugs kath xxx
ReplyDeleteWow Cathie...this is gorgeous! I love the way you've created the seahorse using sand and the UTEE and I adore the colour palette you've chosen to use ~ it just all works so well together and I adore the finished project! <3
ReplyDeleteLove your beautiful step photos, Cathie. All the embellishments and details you created are amazing! :)
ReplyDeleteFantastic project Cathie!! The paste pieces are super cool! I love them. And how very clever to use the Bird Branch as coral. That was a really brilliant idea.
ReplyDeleteWow Cathie! this canvas is amazing! The textures you've created and your tutorial are fabulous! Love to see your creative process! Thanks for sharing with us! barbara
ReplyDeleteWow Cathie! this canvas is amazing! The textures you've created and your tutorial are fabulous! Love to see your creative process! Thanks for sharing with us! barbara
ReplyDelete