Happy Monday everyone! Ready for a new challenge on the Simon Says Stamp Monday Challenge? I hope you are because this is a fun one! (Well, they're all fun but this one is close to my heart.) I love to make handmade flowers. I'm relatively new to making them but I hope after a lot of practice I can get better and better. A couple of challenges ago, we had a participant in the challenge, Dr. Sonia S V, that made BEAUTIFUL handmade flowers. I have a tutorial below on how I made my flowers using her steps but I suggest you see her tutorial, which is exquisite, you can find it here. My roses are no where near as beautiful as hers, but with more practice I hope to get them to look just as incredible.
Don't forget to check out, Linda, our guest designer this month from heARTfully inspired, you will love her style. Please stop by and leave her a sweet comment.
I used Tammy Tutterow Shabby Posies die set and cut 2 of the smallest size dies and 5 of the next size bigger.
I punch a hole in the center of both of the smallest size petals.
I use the end of a small paintbrush as my tool for forming the inner section of the rose. I put the paintbrush handle through the hole I punched in the center of the petals and wrap one petal at a time around the paintbrush making sure to glue each petal as I go along.
Here, you can see my petal forming as I wrap each petal around the handle.
I complete the center of the rose and continue to add more petals.
I remove the center of the rose that I just created from the paintbrush and add another die cut flower onto the handle.
Here, you can see the rose beginning to take shape after the second set of petals are wrapped around one another. This completes the center of the rose.
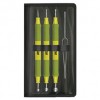
I now use the larger size die cuts for the outer petals of the rose. I shape the petals using a stylus and foam pad from the McGill flower shaping kit, using circular movements to break down the fibers of the paper and shape the petals.
Here is the shaped piece ready for the center of the rose.
I glue the rose center to the middle of the shaped petals.
I continue to add all the petals to the flower by gluing each set one under the other. I make sure to offset the petals as I glue them together.
Now that all the petals are glued together, I begin to shape the petals by using the tweezers that come in the flower shaping kit to bend the petals backwards. I continue shaping and bending until I'm happy with the way the rose looks.
I'm happy with the rose and make two more for my card.
My card will have three layers, so I begin creating the first panel for my layers. This will be the top layer. I chose a piece of patterned paper from the Prima Tales of You & Me paper collection and stamp the Tammy Tutterow Designs Dear Ruby background stamp onto the paper with Versamark Embossing Ink. I then cover the ink with Hero Arts white embossing powder and heat it with a heat gun.
Here you can see how pretty the embossed background looks against the darker patterned paper.
I want to add more interest to the panel, so I tear a piece of Tim Holtz Melange tissue paper that I will adhere to the bottom corner of the panel. I also distress the edges of the panel using the Prima Distressing Tool.
I adhere the tissue paper using Ranger Multi Matte Medium by applying the adhesive to the panel where I want the tissue paper to go and then place the tissue paper on top of the glue. I then brush more multi matte medium over the top of the tissue paper completely securing it to the panel. I set that aside to completely dry.
While the top panel is drying, I begin to prepare another layer which will be on the bottom. I cut a 4-3/4" x 6-3/4" piece of coordinating card stock and emboss it with the Tammy Tutterow Designs Horsehair embossing folder. I ink the edges with Walnut Stain Distress ink (not pictured) and set that aside.
To create the apothecary bottle for my card, I use the Tim Holtz Apothecary Bottles die set and cut the largest bottle out of one of the patterned papers from the same paper collection. I cut the shape from a piece that has roses on the sides and make sure the paper will cut in a strategic way so the flowers are along one side of the bottle. I cut another bottle (same size) out of velum which I will place on top of the patterned paper bottle.
I adhere the velum bottle on top of the patterned paper bottle using vellum adhesive so the adhesive doesn't show.
I cut the bottle topper from another piece of the patterned paper in the collection and adhere that to the top of the bottle.
To create the greenery that will surround the roses, I use a mini ink blending tool and apply Peeled Paint and Forest Moss Distress Ink onto a piece of white card stock. I do not want a smooth variation of the two colors, so I ink up the blending tool and begin the circular motions directly onto the paper. I do this because I want harsh lines to show which will color the delicate die that I will be using with lighter and darker colors throughout.
Here you can see the variations in color, which is much easier to achieve by inking the card stock before cutting out the delicate shape. If I were to cut the shape first and then try to get those variations in color, the delicate die could easily tear and it would take much longer to create.
I have all the pieces for the base of the card and begin putting all the elements together. I add some Simon Says Stamp Circle Loops underneath the greenery along the left side of the card panel and the bottle on the right side.
To finish the card, I cut a 4-3/4" x 6-3/4" piece of patterned paper for the middle panel piece and adhere that underneath the top panel. I then adhere those panels onto the embossed panel and finish the card by adding the roses and small sentiment stamped onto one of the tabs from the Tammy Tutterow Shortie Tabs dies.
I hope you enjoyed seeing the process I used to create my card and that you promise to give handmade flowers a try. Trust me, it gets better and faster with lots of practice. Please join us in all the fun and add your project to Simon Says Stamp's Monday Challenge Blog for your chance to win a $50 gift voucher to their amazing store.
For more inspiration, tips and tricks for all types of papercraft creations, follow Simon Says Stamp on:
You can find all the following supplies I used to create this project at Simon Says Stamp:


absolutely gorgeous vinatage looking beauty! Your roses are just stunning too. Thanks for sharing it all step by step!
ReplyDeleteReally beautiful Cathie! I love how you incorporated the vase die and viney greens! Gorgeous! Hugs, Autumn
ReplyDeleteYour roses turned out beautiful!
ReplyDeleteThe bottle is soooooo pretty here! I love your flowers a lot and the white embossing on the background gives freshness to the project. Hugs, Marzena
ReplyDeleteGorgeous card, Cathie! Love your background and how you made the bottle - cool technique! Love the flowers!! hugs, Maura
ReplyDeleteGorgeous card Cathie, the flowers are so pretty and I love the bottle and background, the whole shabby chic design is stunning! :-)
ReplyDeleteluv
Lols x x x
Wow! You did an amazing job on this project and I loved seeing the way you created those beautiful blooms! I also thought it was really clever of you to include a floral motif on the bottle. This is elegant and I love the incorporation of raggedy edges, too!
ReplyDeleteWhat a gorgeous card, the whole design is just perfect and those beautiful flowers are just so pretty! I really do adore it Cathie... <3
ReplyDeleteSo beautiful Cathie! I love the flowers, they are fabulous as always! the idea to cover your bottle with vellum is fantastic! love so much the effect! Thanks for sharing! barbara
ReplyDeleteBeautiful card Cathie!! I LOVE the wonderful flower you made, they turned out perfectly. Gorgeous background too.
ReplyDeletebeautiful card Cathie and those roses are stunning and so life like...hugs kath xxx
ReplyDeleteWow.. your card is stunning, Cathie. The flowers you created are just amazing! :)
ReplyDeleteThank you so much for the instructions on how you made your beautiful roses, as well as the link. I would love to be able make them as pretty as you have. I love this card and it is so nice of you to share how you did it! Thank you so much for the inspiration!
ReplyDelete-Miranda
TheCraftyCritter.com
Gorgeous card, Cathie! Love the handmade roses, they look spectacular! Hugs, Sandra
ReplyDelete