

Hi Everyone! I hope you all had an amazing weekend and that you're ready for another fun week over on the Simon Says Stamp Monday Challenge. Our theme this week is Nautical/By The Sea. This is a very long post because I created my mixed media panel using die cuts that I already had on hand and altered them to create my scene. I had a vision in my head of what I was going to create but I didn't have any stamps or die cuts to make it happen and that's when I got the idea to just look at what I had and see what I could do to create what I was envisioning. Sometimes you have to use what you have in your stash and for me this is an exciting challenge.......sometimes. I admit sometimes it's frustrating, but this time I really had fun with the challenge. I hope you enjoy this step by step tutorial and that you can take away a little something to add to your mixed media bag of tricks.


I decided I wanted to have a sailboat in my scene but didn't have any stamps or dies that fit the vision I had in my head so I decided to use dies I already had on hand and altered them to create the pieces for my sailboat. I cut shapes from Spellbinders Matting Basics A and Classic Large Ovals out of plain copy paper. I will use these as pattern pieces for cutting out the final shapes from white chipboard.

I cut them, as shown above, to create the pieces I needed for my sailboat.

After cutting the pieces I arranged them in the shape of a sailboat. Everything looks good, so I will use these shapes as pattern pieces on white chipboard.

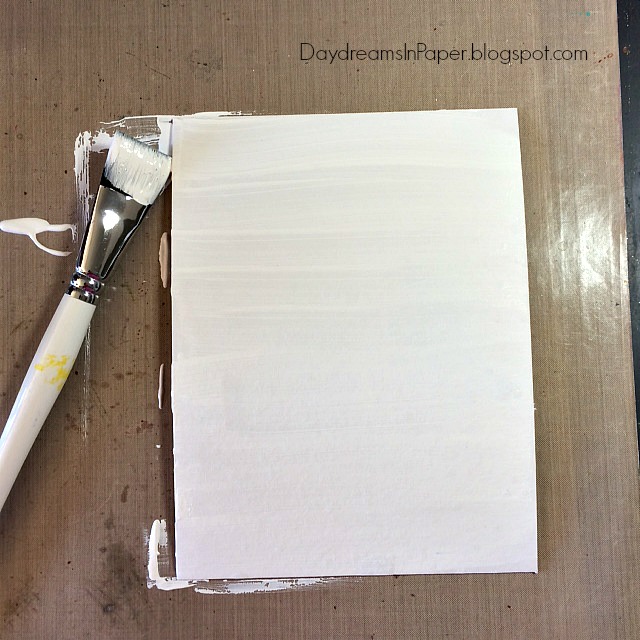
After cutting the pieces from white chipboard, I adhere them to Simon Says Stamp Vintage Paper using Ranger Multi Matte Medium and cut off the excess around the edges.

I brush the top of the shapes with Ranger Vintage Collage Medium for a vintage look.

Here you can see by putting all the pieces together how I created the sailboat for my project.

I needed some waves for my project but didn't have any wave die cuts so I had to create some. I used one of the shapes from the Sizzix Pediments die set.

I cut the shape out of white card stock and cut as shown above. The top pieces will become the pieces for my waves.

Here you can see how I adhered them together to create the waves.

I wanted them to have some texture, but something soft and bright white, so I went with Dina Wakley White Heavy Body Acrylic Paint and brushed it on like frosting. These will take a long time to completely dry.
I begin creating my background by cutting a 6"x 8" piece of white chipboard and cover it with gesso.

When the gesso is completely dry, I spray the panel liberally with water using the Distress Sprayer.

Immediately, I sprinkle on Paper Artsy Infusions A Bit Jaded onto my wet panel and watch the colors move around. This is magical to watch! Look at the beautiful colors begin to develop and the little walnut speckles in the Infusions powder adds so much depth.

I add more water to my panel and pick it up with my hands and move the panel around so the colors move and mix.

I add a bit of Paper Artsy Infusions Violet Storm to the edges and add more water to move all the colors together. I then set my panel aside to completely dry or if you are impatient (like I am sometimes), you can use a heat tool to dry the panel.

While my panel is drying, I begin creating my waves. I used Bazzill Gumball card stock and tore three pieces across for my waves.

I used the specks stamp from the Tim Holtz Cracks & Specks stamp set to create some depth and movement to the waves. I stamped Lawn Fawndamentals Yeti Pigment Ink in random areas.

Next I added My Favorite Things After Midnight ink.

For the final color, I added Simon Says Stamp High Dive dye ink.

I adhere the torn strips to my panel using Ranger Multi Matte Medium being careful to only add the glue to the bottom of the strip so I can form the tops of the strips into wave foam and tuck in the waves I made from the Tim Holtz Pediments die.

I cut the excess off the edges using my Tim Holtz Scissors and curl the top of the paper to form the wave foam. Here you can see why it was important to adhere only the bottom of the strips of card stock to the panel.

I paint the top of the curled card stock with Paper Artsy Snowflake Fresco Finish Paint to create wave foam.

To continue the stormy sky theme, I stamp on one of the images from the Tim Holtz Bitty Grunge stamp set with Jet Black Archival Ink.

I used Black Soot Distress Ink mixed with water and splattered it onto my panel with the Distress Splatter Brush.

I tuck the "waves" I created from the Tim Holtz Pediments die set underneath the curled card stock and adhere them with Ranger Multi Matte Medium.

As my panel dries, I continue working on my sailboat. I want to give it some interest and texture so I stencil on the Tim Holtz ZigZag stencil using Wendy Vecchi White Embossing Paste with the Dina Wakley Palette Knife. After that completely dries, I ink the edges with Dandelion Archival Ink.

For the hull of the sailboat, I stamped on the numbers stamp from the Tim Holtz Perspective stamp set with Jet Black Archival Ink.

I cut out some clouds from the Tim Holtz Mini Airplane & Cloud Movers & Shapers die set and ink the edges with Hickory Smoke and Black Soot Distress Ink to continue the stormy theme. I adhere those onto my panel and then add my sailboat. For my sentiments, I used Tim Holtz Small Talk Stickers.
I was really pleased with the final outcome of my project and enjoyed seeing what I could do with die cuts I had on hand. I hope you were able to take away something from this tutorial to use on a future project and I hope you join us for a chance to win a $50 gift voucher to Simon Says Stamp amazing store. Enjoy!


LOVE this Cathie!! the whole design is absolutely fabulous! I love how you made the boat and the sea, absolutely brilliant! Love the step by step photos too :-)
ReplyDeleteluv
Lols x x x
Thank you, Lols!
DeleteHugs,
Cathie ♥
The waves, both the curled paper and the repurposed die are inspired! Everything in this piece is wonderful. Thank you for the step-by-step. I learned some new techniques to add to my tool-box :)
ReplyDeleteI'm so happy to hear you enjoyed my project this week, Rjacki, and that you learned some new techniques to add to your tool box. I love to share what I've learned from others. Thank you for taking the time to stop by and leave your sweet comment.
DeleteCathie ♥
love this Cathie! SO very clever how you used the Pediment die for the waves and the circles in the background of the sky!
ReplyDeleteThank you so much, Paula! I really appreciate you taking the time to stop by and leave such sweet comments. It means a lot to me.
DeleteCathie ♥
Like the wonderful artsy look of this w/ detail. Thanks for sharing all the steps. Have a Bee-utiful day!
ReplyDeleteMelissa
"Sunshine HoneyBee"
Thank you, Melissa! I'm so happy you enjoyed seeing all the steps as I enjoy so much sharing what I've learned from others. Have a wonderful week and thanks so much for stopping by and leaving your sweet comment.
DeleteCathie ♥
Your work is amazing! How much creativity, the result is really lovely, I have studied in detail the tutorial that I very much appreciated. Thank you and congratulations!
ReplyDeleteThank you so much, Stefania! I'm so happy you enjoyed the tutorial and thank you for stopping by and taking the time to leave such a sweet comment.
DeleteCathie ♥
AWESOME! Thanks for sharing the process!
ReplyDeleteThank you, Lagene! I'm so happy you enjoyed seeing the process. Thanks for stopping by and leaving your sweet comment.
DeleteCathie ♥
This is fantastic! I love all the details you've used to create this wonderful by the sea project - and thanks for sharing your steps!
ReplyDeleteThank you, Karla! Thanks for stopping by and leaving your sweet comment, it really made my day and I'm so happy you enjoyed seeing the steps.
DeleteCathie ♥
Beautiful card! And such a well written tutorial, thanks for taking the time to share : D.
ReplyDeleteThank you so much for your sweet comments and taking the time to stop by and share them with me. It means a lot to me.
DeleteCathie ♥
How beautiful. I love ocean scenes. This is the best.
ReplyDeleteThank you so much, Ann Marie! I too love the ocean and thank you for taking the time to leave your sweet comment.
DeleteCathie ♥
Absolutely perfect mixed media piece, Cathie! I love EVERYTHING about it! The waves really caught my eye! :)
ReplyDelete*mwah*
Steph
Simon Says Stamp!
Thank you, Stephanie! I'm so happy you enjoyed my project.
DeleteHugs,
Cathie ♥
This is absolutely wonderful!! I love the imagination you have, using dies to create new shapes! You are an inspiration to me.
ReplyDeleteThank you so much, Robin, and thank you for taking the time to stop by and leave your kind and sweet words! They put a huge smile on my face.
DeleteCathie ♥
Your card is amazing...the way you created the water and the waves is so creative, and I LOVE the boat made out of book pages! So very creative, and so many fun techniques! Love it!
ReplyDeleteThank you Susan, and thanks for taking the time to stop by and leave such a sweet comment. I so happy you enjoyed my project.
DeleteCathie ♥
Wow, your chipboard card is awesome! Your tutorial is super useful and filled with many brilliant ideas! I love it!!!
ReplyDeleteThank you so much, Monika! I'm so happy you enjoyed the tutorial. Thanks for taking the time to stop by and leave your sweet comment.
DeleteCathie ♥
OMG! I LOVE it! The background left me with open mouths! What a beautiful melted colors. This product is my discovery of the month, thank you for sharing this beauty! I just love your project as it is. All the parts are absolutely perfect. The dark stunning top with the waves at the bottom. Te ship rocks! And the little waves you made with the Pediments die ar just crazy! I have this die but would never imagine it could work as waves! Hugs, Marzena
ReplyDeleteThank you so much, Macarena! I'm so happy you enjoyed my project and yes, those Paper Artsy Infusions are so much fun.
DeleteHugs,
Cathie ♥
I'm speechless! I watch and watch again the way how you created the waves! genius! Absolutely stunning project! Barbara
ReplyDeleteThank you so much, Barbara!
DeleteHugs,
Cathie ♥
I'm speechless! I watch and watch again the way how you created the waves! genius! Absolutely stunning project! Barbara
ReplyDeletestunning Cathie...love the stormy Infusions sky..your adorble sailboat and genius Pediments waves...hugs kath xxx
ReplyDeleteThanks, Kath!
DeleteHugs,
Cathie ♥
stunning Cathie...love the stormy Infusions sky..your adorble sailboat and genius Pediments waves...hugs kath xxx
ReplyDeleteWOW! This is stunning, Cathie! Amazing tutorial! Love how you've used bits and pieces of those die cuts and made this gorgeous piece! the color of the sky is fabulous! Love that color so much! Hugs, Sandra
ReplyDeleteThank you so much, Sandra!
DeleteHugs,
Cathie ♥
Love your beautiful creation! the colors and texture are awesome!
ReplyDeleteThanks, Meihsia!
DeleteHugs,
Cathie ♥
Holy cow! This is taking brilliant to a whole new level! I'm so impressed at the double-duty potential you brought out in so many shapes! I also thought it was genius of you to emboss a chevron on the sail. LOVE THAT! it was also fun to see the powder pigment being used. I had the exact same stuff and wanted to use it on my project, but then my 2-year-old got a hold of the bottle (on dad's watch-- not mine!) and dumped the whole thing out before I'd even used it. And lucky me, she stepped in the powder, too, so it got tracked all over the house. She is precious-- and each blue streak and smear reminds me that she'll only be little once, but I did miss out on using this! I'll have to buy some more, especially when I saw how brilliantly you've used it here!
ReplyDeleteOh no, Andrea!! I can only imagine those little footprints all over the house because that pigment is soooo concentrated! I have my inks stored on a shelf against the wall that shares the same wall as my sons room and one day he was very angry and slammed the door. Well, needless to say, all the inks flew off the shelf and onto the floor and the lids did not stay on so I have little dots of color all over the carpet behind my studio chair. It made me really mad at the time but it is really pretty to look at. You're right though, they are only little once and they grow so fast. Thanks for your sweet comments about my project too!
DeleteHugs,
Cathie ♥
Holy cow! This is taking brilliant to a whole new level! I'm so impressed at the double-duty potential you brought out in so many shapes! I also thought it was genius of you to emboss a chevron on the sail. LOVE THAT! it was also fun to see the powder pigment being used. I had the exact same stuff and wanted to use it on my project, but then my 2-year-old got a hold of the bottle (on dad's watch-- not mine!) and dumped the whole thing out before I'd even used it. And lucky me, she stepped in the powder, too, so it got tracked all over the house. She is precious-- and each blue streak and smear reminds me that she'll only be little once, but I did miss out on using this! I'll have to buy some more, especially when I saw how brilliantly you've used it here!
ReplyDeleteCathie, this is fantastic! I really, really like how you looked at what you had in your stash in a whole new way and made it work for you! You have created an amazing piece out of the papers and shapes. love how you did your waves! hugs, Maura
ReplyDeleteThanks so much, Maura!
DeleteHugs,
Cathie ♥
Hey, that's amazing! I also thought about making whitecaps with distressed paper - you did it :) But there's so much more inspiration in your project: what a great idea using the pediments for waves - gorgeous! I also like the colors and how you created the background - thanks for this wonderful tutorial!
ReplyDeletebest wishes, Irmgard
I'm so happy you enjoyed my project and thank you so much for taking the time to stop by and leave your sweet comments.
DeleteCathie ♥
What an amazing card and absolute genius to have created that little ship out of those dies! The use of the Infusions creates a beautiful background and I really must get around to using mine...I just love the effect and the colour! Thank you so much for sharing this wonderful project, Cathie...it's always such a pleasure to see your work! <3
ReplyDeleteThank you, Emma, for your sweet comments! The Infusions are such a blast to work with and I can't wait to see you work your magic with them.
DeleteHugs,
Cathie ♥