

Hi Everyone! Welcome to another challenge at the Simon Says Stamp Monday Challenge Blog. This week's challenge is Upcycle/Recycle and I have to say this was a really fun challenge for me. This type of challenge forces you to think outside the box and use an object in a totally different way than it was intended to be used or to use an object that would have otherwise ended up in a landfill. I chose to use an old salt and pepper shaker, an empty cereal box and some old imitation flowers. I love to surround my crafting area with little creations that make me smile and flowers always make me smile, so I turned the salt and pepper shakers into vases. One vase is for handmade flowers and the other for real flowers. You can use an old jam or jelly jar, mason jar or even an empty soda/pop bottle. Glass containers are everywhere and they can be turned into something gorgeous with a little paint. Join in the fun and go around your house and see what you can find to upcycle/recycle and use in a completely unique and different way.
Simon Says Stamp is giving away a $50 gift voucher to one lucky random challenge entrant.

Here are my creations:

To begin, I started with an old set of glass salt and pepper shakers. Make sure they are clean and completely dry before painting.

I wanted to use both shakers and painted them two different ways. The first one I wanted to be pink with sanded edges and the second shaker I wanted green with a black undertone color. For the pink shaker I simply painted it with two coats of Distress Paint in Spun Sugar making sure to completely dry the first coat before applying the second one. The green shaker was first painted with Distress Paint in Black Soot and left to dry completely.


While my the shakers were drying, I started making the embellishments for one of the shakers. I cut out butterflies using Tim Holtz Butterfly Frenzy from cardstock and stamped them with a newsprint image using Tree Branch and Potting Soil Archival Ink. I didn't have a newspaper print stamp so I used a stamp that had some print on the inside of a heart from Paper Artsy's Eclectica EDY01 stamp set. (I will put a link to some alternative newspaper print stamps that you can use in the supplies list below, but sometimes you have to improvise and use what you have.)

After all the butterflies were stamped, I inked the edges with Vintage Photo Distress Ink.

From the same colored cardstock I cut out some flowers from Tim Holtz Tiny Tattered Florals. I inked the edges with Vintage Photo Distress Ink before forming the flowers and set them aside.

My shakers were completely dry and ready to finish. For the pink shaker, I sanded the raised edges to give it a distressed look. I used the Tim Holtz Sanding Grip Block Tool to do the sanding. This is a great tool because the sand paper isn't too rough for most paper craft surfaces. If using regular sandpaper, be careful not to use one that is too gritty because it will scratch your glass.

For the green shaker, I wanted a two toned look. Remember I painted the base color with Black Soot Distress Paint and now I needed to paint the top color. I used Shabby Shutters for the top coat. I let the paint sit on the shaker for about 20 seconds and then gently rubbed off the Shabby Shutter color to expose the Black Soot paint underneath.

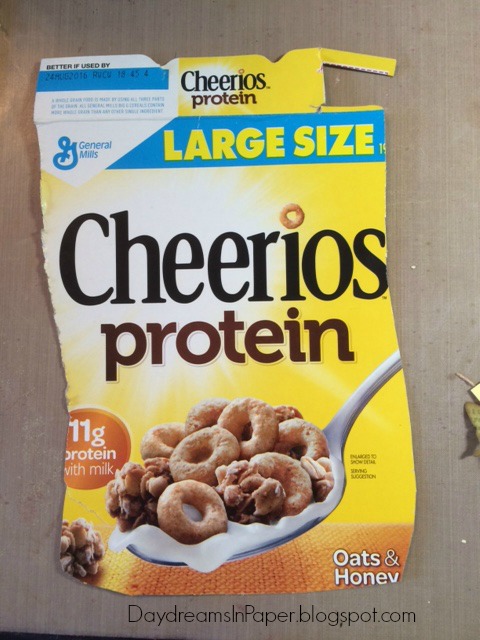
This next embellishment is where the used cereal boxes come in. I used an empty Cheerios box to make the flowers and cut them out using Tim Holtz Tattered Florals Bigz die.

After the flowers were all cut, I painted them with Shabby Shutters and Squeezed Lemonade Distress Paint having the colors alternate on the layers of the flower. Set these aside to completely dry.

When the flower layers were complete dry, I stamped them with two different stamps from the Tim Holtz Mixed Media CMS125 set with Potting Soil Archival Ink. When that was dry, I used a stylus tool to form the flowers along with a soft flower shaping mat underneath so the flowers could be easily shaped. (Hint, if you don't have one of these mats, you can use a mouse pad.)
Using the old cereal box is the perfect material for forming the flowers because it will hold its shape and you don't have to worry about the edges tearing. After forming the flowers, I inked the edges with Vintage Photo Distress Ink.

I layered the flower petals onto each other and used one of the tiny tattered florals for the center of my flower. I made a back piece for the flower so the cereal box wouldn't show from the back of the flower arrangement in my vase and adhered that with Ranger Glossy Accents. (Hot glue will not work on the slick and shiny cereal box side.)


I cut leaves out of cardstock using the rose petal from the Tim Holtz Tattered Leaves Bigz die and attached the flower and leaves to a piece of a green coated floral wire stem. I also used the same floral wire stem to create a floral sprig. To create the sprig, I adhered the tiny tattered florals that I created with hot glue to the wire. Along the top of the shaker I strung some burlap twine and tied a pretty bow. In the center of the bow I adhered a layered butterfly, added the old used imitation flowers and my piece was complete. Here again are my recycled salt and pepper shakers.
I hope you enjoyed how I used some old salt and pepper shakers and potential garbage to create my flower filled vase. See what you have lying around the house that you no longer want or need and come up with a cool way to create something beautiful from it. Have a great week and I look forward to seeing what you create!
For more inspiration, tips and tricks, follow Simon Says Stamp on:


You can find all these supplies at:


Here are some alternatives for the newspaper print stamping on the flowers:


In my tutorial I formed flowers on a soft mat that I have from a flower shaping kit. The mat below is perfect for shaping flowers and the best part is you can use it for so much more! With this mat you can stamp on one side and flip it over and paper pierce and shape flower petals with a stylus. It's a wonderful multi-tasking tool!!!


Oh my goodness these are absolutely FABULOUS Cathie!! what gorgeous creations and awesome recycling! LOVE them! :-)
ReplyDeleteWelcome to the team!! Woo Hoo!! :-D I am thrilled to have you join us!! :-D
luv
Lols x x x
Thank you so much, Lorraine! I'm thrilled to be here and so happy you enjoyed my project. :)
DeleteCathie, your little vases are adorable! I love how you used the cereal boxes for the flowers an the butterflies are amaxing with the subtle stamping. Congrats on your DT assignment.
ReplyDeleteThank you, Barb for stopping by and leaving such a sweet comment! I really appreciate that. :)
DeleteCathie I love this project!!!! The flowers are awesome and so the butterfly! Smart way to upcycle little vases! ;)
ReplyDeleteWelcome to the Simon Says Stamp! Monday challenge team from a newbie like you! hehehe!!!
Congrats and many hugs!
xx Zoey
Thanks, Zoey! I'm thrilled to be on the team and humbled to be there alongside someone of your talent. You're a huge inspiration! <3
DeleteWonderful little bottles for your oh, so lovely flowers and butterflies, Cathie! I am really admiring the soft colors, and how old you have made them appear. Welcome to the team, I am looking forward to creating with you!
ReplyDeleteThank you, Maura! I'm so happy to be on the team and look forward to creating alongside such talented ladies like yourself that I admire and from whom I've gotten so much inspiration. <3
Deleteoh what a fabulous project!!! Guess when i drop of donations to the thrift shop in turn I'll be looking for salt and pepper shakers:):) What cute little gifts these would make!
ReplyDeleteThanks, Linda! These would make cute little gifts, what a wonderful idea!
DeleteWow, your flower vases are stunning!!!
ReplyDeleteThank you, Monika! I appreciate you taking the time to stop by and leave such a sweet comment.
DeleteSalt and pepper vases with cereal box flowers!! Too too clever and such a beautiful outcome!! WELCOME! We're so happy to have you on the team!
ReplyDelete*mwah*
Steph
Simon Says Stamp
Thank you so much, Stephanie! I'm thrilled to be on the team and your sweet comment made my day. Cathie <3
DeleteCathie , i'm happy to work with you!! Those little vases .. salt and pepper, this is an incredible idea! Soft colors you used are so beautiful and the flowers arrangement amazing! BArbara
ReplyDeleteThanks, Barbara! I'm so happy to be part of the team and love your work as well as all the other ladies. You've all been such an inspiration to me. Cathie <3
DeleteSuch a fun project, Cathie! Great idea to turn those salt and pepper shakers into little vases! Those flowers look amazing! What a fab home decor piece. Happy to have you on our team! Hugs, Sandra
ReplyDeleteThank you, Sandra! I'm so happy to be part of the team and thanks for your sweet comments. Cathie <3
DeleteWhat a great idea!! Love your vases and the flowers are amazing! Gorgeous colours and distressing. I am so glad you have joined us on the team Cathie!
ReplyDeleteThank you so much, Anna-Karin, for the sweet comment on my project! I'm so happy be part of the team, thanks for the warm welcome. Cathie <3
DeleteHow exciting that you are on our Simon team! I did a little happy dance in my head when I found out you were on the team (a real happy dance would've not been pretty- coordination is not always my thing)! And what a wonderful project! I love salt shakers and you took these to a whole new level! And I was stunned when I saw the Cheerio's boxes enter the scene! But a brilliant use of cardboard and the whole thing is really lovely.
ReplyDeleteThank you, Andera, for such a warm welcome and your sweet compliment. I'm so happy to be part of the team and looking forward to getting to know everyone better. I've had such warm welcomes from everyone. I knew all you ladies were talented, but finding out that everyone is so sweet is like icing on the cake. Cathie <3
DeleteThis is such a creative and gorgeous project, Cathie. It's so great to have you on our team. You are so talented. :)
ReplyDeleteThank you, Meihsia! I'm so happy to be part of the team and everyone has made me feel so welcome. Thank you for your sweet comment! Cathie <3
DeleteLOVE how this turned out! I've used cereal boxes for plenty of things... must try using them for flowers!!
ReplyDeleteThank you so much! This was the first time I used cereal boxes to make flowers and wasn't sure how easy it would be to form the petals but I was pleased with how they turned out. I'm so happy you enjoyed my project. Thanks for stopping by and leaving a sweet comment. Cathie <3
DeleteA really beautiful project and the flowers and colour combinations is so very pretty! So happy to have you on our team and I can't wait to see more of your work... :) <3
ReplyDeleteThank you, Emma! I'm happy to be part of the team and looking forward to getting to know everyone better. Cathie <3
DeleteWhat a lovely project. I have stopped collecting cereal boxes but this makes me want to start again. They are great for projects that require thin chipboard. Hope you will continue using them in your projects as well!
ReplyDelete