


Here is my "Beautiful Day" canvas:

I prepared an 8x8 canvas with gesso and let that completely dry before painting.

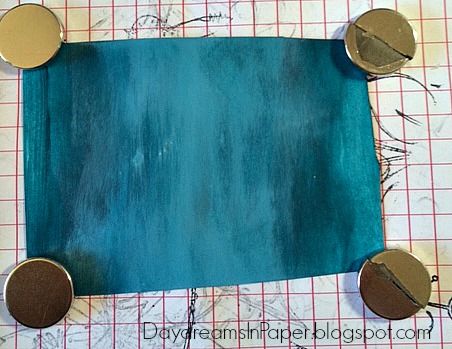
I used Ranger Cut & Dry Foam to blend the paints. It's a great way to blend the Paper Artsy Fresco Finish Paints. The paints I used for the grass were Hyde Park and Guacamole and for the sky I used China, Glass Blue and Mermaid.

I blended in some lighter tones of blue to make it look as though the sky had wispy clouds. I am going for a whimsical look for this project.

My grass and sky are complete and it is at this point that I add stencils and stamps to give it depth.

After completing the canvas, I began creating the flowers for my project. To get beautiful flowers with darker and lighter blended petals and centers, I brushed some Paper Artsy Fresco Finish paints in Tango, London Bus and Yellow Submarine on cardstock in a circular motion before stamping. (Make sure your paint is completely dry before stamping.) These paints dry very quickly so if you don't have a lot of patience, you're going to LOVE these paints.

The next step is to position your stamp so the center of the flower is in the lighter area. (Paper Artsy stamps are foam mounted rubber stamps and very high quality.) After centering my flower, I'm ready to stamp. I use my Misti for stamping just in case the stamping lines aren't complete. If I need to re-ink and re-stamp I have no worries when using the Misti.

My stamping looks great and my flower is ready to cut out. (I used Archival Jet Black Ink. When using this ink, just run over it with a heat tool to make sure it's completely dry otherwise when you begin cutting out the image your ink will smear.)
You can see how pretty it will be with the yellow center and blended orange petals. (After the image is cut out, I went over the cut edge with a Copic BV29 marker so the white edges of the cut paper wouldn't show.)

Here are a few more examples of how you can paint your cardstock pieces before stamping. I was going for a whimsical look.
For my next flower, Instead of using a circular motion to paint, I brushed across and blended the colors just slightly so the flower would be a bit whimsy.

When the paint was completely dry, I went ahead and stamped my image.

I forgot to take a photo of the completed stamped flower but here is a close-up of it from my finished canvas.

If your flowers have a stem and petals, blend the colors onto cardstock in the size and shape of your stamp where you want particular colors to appear. I used back and forth strokes for this flower and then when it was completely dry I placed my stamp onto the painted cardstock before picking it up with my Misti.


Now it's time to create my butterfly. I blended three paints together on cardstock and after they were completely dry I stamped a butterfly using my Misti again.
I painted the inside of the wings with two lighter paints using a tiny paint brush.

This stamp is already whimsical but to accentuate the whimsy a bit more, I went over some of the black lines with a Uni-Ball Signo white gel pen.

I wanted to do some additional stamping onto my canvas. One of the problems that may occur when stamping onto a canvas is that the lines on the image may not be complete. Sometimes you want this effect but sometime you don't. In this case I wanted the lines to be complete and this is a case where I can't use my Misti (sigh), but have no fear. I can use a Ranger Fude Ball 1.5mm Black Pen. What I love about this pen is that it is a deep black and the 1.5mm size is perfect for this particular stamp. (Be sure to let this ink completely dry or it will smudge.)

Often times, I will put highlights inside stamped images. Here, I add Paper Artsy Fresco Finish Snowflake paint with my fingertips. (When I was putting on the final touches for this project, I changed my mind and wanted to go with a yellow highlight center of the stamped image and around the corner so I mixed Yellow Submarine with Snowflake and used my fingertips to paint inside the image as well as around the image. You will see that in my final project.)


Here is another tip for adding some interest to a canvas. I took an old gift card and slid an edge in Black Soot Distress Paint and touched it onto the canvas to create some vertical and horizontal lines. (Distress Paint is excellent for this because of its fluidity.)

All I have left to do is adhere my flowers, butterfly and other stamped images onto the canvas with Ranger Multi Medium Matte.
Now for my sentiment, which is part of the lyrics from the song "Beautiful Day" by U2. I printed it on my laser jet printer using a font called......can you guess.....yep, you guessed it, "Beautiful Day" by artist Allyson Hirst. This font even has the same whimsical look I was going for, how amazing is that? This font is available free for personal use and you can get it here.
After printing the sentiment on white cardstock with my laser jet printer, I tore the sentiment out and inked it with Squeezed Lemonade Distress Ink and inked the edges with Black Soot Distress Ink.

I hope you enjoyed seeing the process I went through in creating my "Beautiful Day" canvas. If you haven't already, I would love for you to try Paper Artsy Fresco Finish Paints and Stamps because I know you will fall in love with them. I can't wait to see what you create!
For more inspiration, tips and tricks for all types of papercraft creations follow Simon Says Stamp on:


You can find all the following supplies at:


I absolutely LOVE this canvas Cathie! the colours and all the stamping are fabulous and it makes me NEED to go and get me some of these stamps! the whole design is fabulous! LOVE it :-)
ReplyDeleteluv
Lols x x x
Thanks, Lols! I wasn't sure if the bright colors would knock everyone off their seats but I went with it anyway. I do love Paper Artsy stamps and paints. I have to get more! Cathie <3
DeleteGreat background. Love the colors and techniques!
ReplyDeleteThank you! <3
DeleteBeautiful day, beautiful colors, beautiful tutorial, beautiful creation! I love this work!
ReplyDeleteThanks, Stefania! <3
DeleteYour canvas is gorgeous, going to share with my 11yr old, she enjoys working with canvas and may want to try out the paints and stamps.
ReplyDeleteThank you, Judite! I think your 11 yr. old would love these stamps and the paints are so easy to work with because they blend so well and dry really fast, a crafter's dream. Who wants to sit around and wait for paint to dry. Not me! Cathie <3
DeleteI love the explosion of colors! Lovely!
ReplyDeleteThanks, Marcarena! Explosion is a good word. I didn't know if these bright colors were well...just too bright, but I went with it anyway and was happy with the outcome. I know bright colors aren't for everyone but for me...I love ALL color. Cathie <3
DeleteYour step by step is perfect. I love that song too....makes me think of spring!! Nice job
ReplyDeleteThank you!
DeleteAWESOME! I love your vivid colors and whimsical design. The white dots are a super finishing touch!
ReplyDeleteThanks for the sweet comment, Jerrie!
DeleteThanks, Cynthia!
ReplyDeleteThis is such a gorgeous creation, Cathie. The colors are fabulous. Love your great design! :)
ReplyDeleteThank you, Meihsia! I was a little worried about the bright colors but then was pleased with the end result. It makes me happy to hear you liked it. Cathie <3
DeleteLove your technique, very well explained. Love your style and colors.
ReplyDeleteThank you for the sweet comment, Suzanne!
DeleteSo gorgeous!!
ReplyDeleteThank you, Krista!
DeleteAbsolutely Gorgeous!! Love this canvas with beautiful & bright colours! Thanks for sharing this great tutorial with details :)
ReplyDeleteThank you, Priyanka, for taking the time to visit my blog and leave such a sweet comment! Cathie <3
DeleteCame over from SSS to say how much I like this whimsical, vibrant project. Fun!
ReplyDeleteThank you for stopping by, Marcie! I was a little concerned about the vibrancy of this project but overall I like the way it turned out. Some people love bright colors and some hate them, so I wasn't sure how this would be received. I really enjoyed the bright colors and I'm happy others seem to enjoy it too. Cathie <3
DeleteI LLLLOOOOVVVEEE this! Excellent job!
ReplyDeleteAw thank you, Tricia! I appreciate your sweet comment and thanks for taking the time to stop by. Cathie <3
DeleteBright, vibrant, and HAPPY! Fab job, Cathie! I love this canvas!
ReplyDelete*mwah*
Steph
Simon Says Stamp!
Thank you so much, Steph! I almost went with more of a subtle color palette but "bright" kept screaming at me, so I went with it. I'm so happy you liked it. Cathie <3
DeleteFaboulus design and colors! I love your work, it makes me happy! Love the vivid shades that you chose! Barbara
ReplyDeleteThank you, Barbara! That means a lot coming from you. I admire everything you create! Cathie <3
DeleteI'm in love with your beautiful canvas Cathie...love the gorgeous colours perfect for a beautiful day...hugs kath xxx
ReplyDeleteThank you so much, Kath, for a sweet comment from a sweet lady. Cathie <3
DeleteCathie, this is a gorgeous canvas!! I am in love with your colors, and how brilliant everything looks. Love how you did your stamping to get all the different shades, TFS that! And the pops of white turn this from lovely to genius!!
ReplyDeleteThank you, Maura! I'm so happy you liked the colors. I wasn't sure if they would knock people over, being that they were so bright, but I was happy with the outcome. Cathie <3
DeleteThis is fabulous! Thanks for showing how you did it!
ReplyDeleteThanks for stopping by and leaving such a sweet comment. Cathie <3
DeleteWhat a fabulous canvas, Cathie! Love the bright colors and love those flowers! Thanks for showing how you made this beauty! Hugs, Sandra
ReplyDeleteThank you, Sandra! Cathie <3
DeleteFabulous tutorial and such a beautiful, vibrant piece of artwork ~ it's stunning, Cathie and thanks so much for sharing! <3
ReplyDeleteThank you, Emma! Cathie <3
DeleteThis is fantastic Cath and the tutorial is awesome! Loved to see all your steps and how you achieved your final result!
ReplyDeleteVery well done!!! hugs xxx
Thank you, Zoey! Cathie <3
DeleteWhat a treasure trove of techniques you've used here! I love the finished piece and I also really enjoyed seeing all the details of the individual components and how you created them. U2 is such a great band, too, and I think they've made a song for every situation that I've ever needed a "life soundtrack" for! I've seen them a few times in concert and your piece brought back a lot of amazing U2-related memories. Thanks for that and for the artistic inspiration as well!
ReplyDeleteThank you for your sweet comment, Andrea! I love U2 and I know what you mean by "life soundtrack". Wish I could see them in concert. What a blast that must have been. Cathie <3
DeleteThank you for your sweet comment, Andrea! I love U2 and I know what you mean by "life soundtrack". Wish I could see them in concert. What a blast that must have been. Cathie <3
Delete