Tuesday, November 17, 2015
My Favorite Things - Upsy Daisy Birthday Card
Hi Everyone! This month is one of those months where I have quite a few birthday cards to make. I like to take the recipients personality into account when creating them a card, so I knew this card would have to be bright and full of sparkle. I used MFT's Upsy Daisy die set to create the flowers and petals and SSS Wishing Die and Sending and Wishing Stamp set for the sentiment. There's quite a bit of Wink of Stella on the card as well and I couldn't forget the sequins to give it that extra special sparkle. A bright and cheery birthday card is sure to make anyone smile and feel special on their birthday. Enjoy!


Thursday, November 12, 2015
Tim Holtz - Birthday Blueprint
Hi Everyone! I created this birthday card for my brother using a ton of supplies from Tim Holtz. I thought the blueprint balloon was something I could easily use to create a masculine card. I first started out with a stencil and texture paste to create the background. When that dried, I added distress inks and used my spritzer to create the water drops on the card. I stamped out the blueprint balloon on watercolor paper and used distress markers to color the image. I added some burlap to the card and distressed the edges with distress inks and added the Happy Birthday sentiment to the center. I really enjoy stepping out of my comfort zone once in a while. I think maybe I should do it more often. Enjoy!
Wednesday, November 11, 2015
MFT Stamps - Harvest Mouse with An Entirely Different Theme
Hi Everyone! As promised, in yesterday's post, I told you I would create another card using MFT's Harvest Mouse stamp set with an entirely different theme. Again, I did some masking to create a scene where one mouse is giving a bouquet of flowers to another mouse. Who wouldn't be willing to forgive someone after receiving a card with these two cuties on the front. It's so adorable and just makes you smile. Enjoy!
Copics Used:
Mice: E31, E33, E35, D37
Blue Sweater: B02, B23, B24, B28
Purple Sweater: BV00, BV02, BV04, BV08
Ears: R81, R85
Grass: YG17, E33, G09
Tuesday, November 10, 2015
MFT - Harvest Mouse
Hi Everyone! Today I created a cute scene with MFT's Harvest Mouse stamp set. I don't think there's anything cuter than these mice. One thing I love about this stamp set is that there are so many individual stamps that enable you to create a scene. The fall leaves, pumpkins, apples and so much more make the possibilities endless. These cuties aren't just for fall, see my post tomorrow for a cute card made with this same stamp set but an entirely different theme. Enjoy!
Copic Markers Used:
Mice: E31, E33, E35, E37
Sweaters: G00, G02, G05, G07
Vest: Y21, Y23, Y26, Y28
Leaves: E77, YR23, YR07, Y17 also YG63, YR23, Y28
Pumpkins: YR02, YR05, E25
Grass: G24, G28
Tuesday, October 27, 2015
Lawn Fawn - Boo!
Hi Everyone! I swear this is my last Halloween card. I know I said that before, but this time I promise.....hmmm, well maybe not promise, ya never know. When an idea strikes, I just have to get it out of my head so maybe this is my last Halloween card, maybe not, no promises.
For this card, I decided to do some masking. I had this idea of creating a word with stamps and knew it would take many smaller type images but since my Lawn Fawn collection is HUGE, it was no problem.
Here's how I created this card:
For this card, I decided to do some masking. I had this idea of creating a word with stamps and knew it would take many smaller type images but since my Lawn Fawn collection is HUGE, it was no problem.
Here's how I created this card:
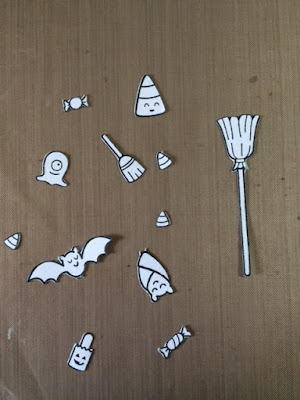
I started by stamping all the images onto masking paper and cutting them out.
Next, I sketched the word "Boo" onto an A7 card mat very lightly in pencil so I could erase the pencil marks after I stamped all the images.
I began stamping images over the pencil sketch and decided which images would go on top and which would appear to be underneath. I continued to stamp images that would be in the forefront of the design. When I was finished with those images, I placed a masked image over them and stamped the other images on top so they would appear to be behind the images I already stamped.
As you can see, there are images that are behind others and this is the effect that is achieved when using this masking technique.
Now that my stamping and masking is complete, it's time to start coloring.
I hope you enjoyed this little tutorial and try this masking technique. It's fun and addicting and there are more ideas in my head that will need to get out on paper. Next stop, Fall/Thanksgiving.....maybe. :)
Copic Colors Used: Y13, Y15, &Y19, E33, E35, E39, E55, YR04, YR24, YR68, YG05, YG07, YG09, V15, V17, C7, C1, C2
Subscribe to:
Comments (Atom)


