Monday, October 31, 2016

How to Make A Shabby Bow

I love to put shabby bows on my projects and have found this is one of the simplest ways to make one. I hope you find it helpful.


To create a shabby bow, follow the step-by-step tutorial below:

1.  Color seam binding or Tim Holtz Crinkle Ribbon with Distress Ink, Stain OR Spray in the desired color by creating a mixture of the ink with water onto a craft mat.

2.   Gently run the ribbon through the ink and water mixture to color the ribbon and dry with a heat tool.

3.   Next, dip the ribbon in the ink and water mixture in random areas to get a pretty variation of color on the ribbon.

4.   Let the ribbon completely dry.


When the ribbon is completely dry, cut a small piece of ribbon off one end. This piece will be used to tie your bow together after it is formed.


Hold one end of the ribbon on your fingers with your thumb.


Weave the ribbon around the index finger, middle finger and pinky.


Continue weaving the ribbon around your fingers and pinky until all the ribbon is woven to the opposite end.


Use the thumb and pointer finger of your free hand and pinch the ribbon in the middle carefully removing it from your hand and secure the center with precision tip tweezers. Using this type of tweezer is like having a third hand.


Tie the smaller piece of ribbon around the center of your bow and remove the tweezers.


Your bow is ready for your project.


Simon Says Stamp Monday Challenge - Thinking of You


It's time for a new challenge on the Simon Says Stamp Monday Challenge. This week our theme is, Thinking of You. Do you have someone in your life that you think about often? I do. My daughter has been in Peru for almost 6 months volunteering in a orphanage and teaching children English. There isn't a day that goes by that I don't think about her. I can't wait to see her and wrap my arms around her and give her the biggest hug (and kiss) she's ever gotten. It is with that, that I was inspired to create my mixed media panel using our theme this week.  I hope you enjoy seeing how I created some of my elements for the panel.


To create my flowers, I stamped the flowers from the Tim Holtz Flower Garden stamp set on Neenah Solar White 110 card stock and colored them with Copic markers, R85, R83, R81, YG67, YG63, YG25, Y15 and Y26.  I outlined the flowers with a pencil for an easy way to fussy cut them out. I love to fussy cut, but sometimes I just don't have the time. This is a time saving way to fussy cut out an intricate image.


Here, you can see the flowers and stems I will be using for my project after I fussy cut them out using this easy method. I set those aside and begin working on my background.


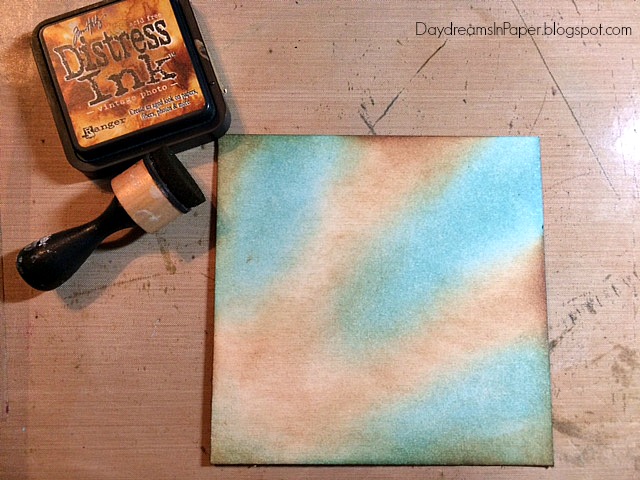
On a 6" x 6" piece of white chipboard, I ink on some Tumbled Glass Distress Ink using a mini blending tool in random areas.


I add some Vintage Photo Distress Ink over the left over white areas on the chipboard piece.


I stamp the Tim Holtz Cracks stamp in random areas on my background using Potting Soil Archival Ink.


Next, I stamp on the Tim Holtz Type stamp in random areas on my background using Garden Patina Archival Ink.


To complete the stamping portion of my background, I stamp on the Tim Holtz Newsprint stamp in random areas on my background using Potting Soil Archival Ink. I leave some of the areas on my background empty. I set that aside to completely dry.


I want to add some texture to my background. I use the Tammy Tutterow Picnic embossing folder to emboss a #8 tag and ink the embossed image with Vintage Photo Distress Ink.


I rip the tag into several pieces.


I adhere a few of the torn tag pieces onto my background using Ranger Multi Matte Medium and set it aside to completely dry. (You can use your heat tool to speed up the process.)


When the glue is completely dry, I add Vintage Photo Distress Crayon pigment to the embossed areas and edges of the tag pieces and rub the pigment in with my fingertips.


Here, you can see all the torn tag pieces colored with the pigment.


My metal piece sentiment is from the Tim Holtz Word Bands set, I want the sentiment to stand out, so I color over it with an Antique Linen Distress Crayon making sure to get the etched letters completely filled with pigment.


When the etched letters are all filled with pigment, I gently rub the excess pigment off the flat part of the metal piece with a dry towel or rag.


I add a strip of burlap to the bottom of my panel and adhere the flowers and stems with Scotch 3D foam tape cut in appropriate sized pieces. I create a bow out of burlap twine and add a metal key trinket to the center of the bow and attach that to the bottom of the flower stems. To add my metal sentiment, I poke holes through the panel with a Tim Holtz Pick Needle tool and attach the piece using Tim Holtz Hex Fastners.

I hoped you enjoyed seeing the process I used to create my Thinking of You mixed media panel. Please join us in all the fun and add your project to Simon Says Stamp's Monday Challenge Blog for your chance to win a $50 gift voucher to their amazing store.


For more inspiration, tips and tricks for all types of papercraft creations, follow Simon Says Stamp on:


 https://www.instagram.com/simonsaysstamp/  Image result for small facebook icon  Image result for small pinterest icon  Image result for small twitter icon  Image result for small youtube icon  


You can find all the following supplies I used to create this project at Simon Says Stamp:


Related Posts Plugin for WordPress, Blogger...