

Welcome! I'm so happy you stopped by. This week on the Simon Says Stamp Monday Challenge our theme is, Little Critters. I created a small mixed media panel with lots of fun techniques. I hope you'll join me below for a tutorial, with photos, showing some of the techniques I used to create the frame and background for my project.
Also, don't forget to check out our guest designer for the month of May. You will be blown away by the amazing, talented Dr. Sonia. I'm telling ya, if you don't stop by her blog and see what she creates, you're really missing out on an amazing talent in the mixed media world. You can thank me later. :)


I start with a 5" x 7" piece of Neenah Solar White 110 lb. card stock and ink on the Cracks stamp from Tim Holtz in Versamark Ink and sprinkle on Ranger Clear Embossing Powder. I heat that with a heat tool and allow it to completely cool before moving on to the next step.

I begin inking the background, very lightly, with Vintage Photo Distress Ink.

I add Ground Espresso Distress Ink in random areas along the edges of the background. I go over the Vintage Photo sections again to deepen the color and again with the Ground Espresso.

Now for the magic. I go over the entire background with a baby wipe. I lightly swipe the baby wipe in the top section from left to right and then move on to the center section from left to right. I finish the bottom section doing the same. See how the color intensifies when moisture is applied?

When the surface is completely dry, I add some specks using the Tim Holtz Specks stamp and ink that on with Potting Soil Archival Ink.

When the ink is dry, I cut the piece down to 3 1-2" x 5" for my project. I choose the area in the bottom left corner.

Next, I add some wildflowers in the shadows of the background but want them to have some darkened shading on them. I first stamp a couple of the wildflowers from the Tim Holtz Mini Bouquet stamp set in Peeled Paint Distress Oxide ink using the Misti.

I clean my stamps before the next step. Now that the first layer of ink is dry, I ink the wildflower stamps with Black Soot Archival Ink but I don't ink them completely. I gently touch the ink pad to the stamps so the ink doesn't cover the entire image. You can see in the photo above how the black ink shades some of the stems and petals of the wildflowers but doesn't completely cover them.

I continue adding wildflowers to the background along the bottom portion of the panel.

I continue the shading technique to each wildflower that I add. When I have all the wildflowers added to the panel, I set it aside to completely dry and begin working on the frame.

To create the frame for my project, I place the largest Tim Holtz Stitched Rectangle on a piece of Neenah Solar White 110 lb. card stock and place the next smallest rectangle from the set inside. I make sure all the sides are even and tape down each frame with painter's tape. (To make sure the tape doesn't tear the frame when you remove it, gently touch the tape to a towel, or your arm, to remove some of the tackiness.)

Here is the result.

I use Prima Art Stones to add texture to the frame. I adhere the large and mini size stones with Prima Transparent 3D Matte Gel. I set the frame aside to completely dry before moving on to the next step.

Now that the frame is completely dry, I add Prima Patina Effect Brass Paste to the entire frame using a paintbrush and allow that to completely dry.

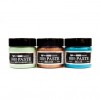
Next, I add Prima Patina Effect Paste in blue and then mint green in random areas over the dried brass paste.

Next, I go over the raised areas and parts of the flat frame with the brass paste again and the frame is done.

To finish my project, I color a couple of flowers from the Tim Holtz Mini Bouquet stamp set with distress markers along with some stems. I cut them out with the Flower Garden & Mini Bouquet coordinating die set. I attach both the flowers and the stems with 3D foam tape for dimension. The bird is fussy cut from the Penny Black Winged Beauty stamp set and colored with distress markers. I add a sentiment from the Tim Holtz Small Talk sticker set and my project is done.
I hope you enjoyed seeing the process I used to create my Little Critters mixed media project and that you join us for this fun challenge by adding your project to Simon Says Stamp's Monday Challenge Blog for your chance to win a $50 gift voucher to their amazing store.

For more inspiration, tips and tricks for all types of papercraft creations, follow Simon Says Stamp on:


You can find all the following supplies I used to create this project at Simon Says Stamp:


Wow Cathie...beautiful project...the background is stunning! Thank you for the inspiration...xxx
ReplyDeleteOMG! This is really magical how the browns on your background turned out in so intensive and deep shades! What a clever trick! You're so creative. I love the background and the solid frame. Hugs, Marzena
ReplyDeleteWOW Cathie such a marvelous project this is...looove the way you made the crackle background ..and the art stones and patina effect is simply out of this world. And you are so so generous in your encouragement of my blog and projects...Thank you so much !!!
ReplyDeleteCheers
Dr Sonia
wow- this is such a gorgeous piece Cathie! So many fine details!
ReplyDeleteAbsolutely gorgeous panel Cathy :-) I love how you made the frame and I will be getting me some of those supplies! the whole design of this is stunning! LOVE it :-)
ReplyDeleteluv
Lols x x x
Fantastic Cathie!! Love the white web cracks in the background, flowers are beautiful and that frame is amazingly textured! hugs, Maura
ReplyDeleteBeautiful rich mixed media piece!
ReplyDeleteWow... this is such a gorgeous creation, Cathie. The background colors and the texture on the frame are stunning. :)
ReplyDeleteAnother fabulous creation Cathie...full of so much texture and gorgeous detail, it's just fabulous and I love the colours you've used, they're so rich! <3
ReplyDeletesuch a beautiful project Cathie...that flower is stunning and I love how you added the Art Stones to the frame...hugs kath xxx
ReplyDeleteLove this!!! Fabulous!!!
ReplyDeleteMust.....have.....art stones now....! I'm always happy to discover a new material I *need*. Thanks for the inspiration, as always!
ReplyDeleteArt stones.... another thing in my wishlist! Stunning piece love your style and these colors are fabulous! Great work as always! Barbara
ReplyDelete